Everything You Need to Know About the Fujifilm x100vi
* = for full sample footage, check out the YouTube video above
Today I’m going to share with you everything you need to know about the Fujifilm x100vi.
And I mean literally everything.
We’ll talk about specs and features, how the VI works for different types of photography, settings and workflow, and even customization and accessories.
And of course, I’ll share with you what I’ve learned from using this camera for nearly 2 years.
By the way, if you want to learn all about improving your photography, shoot more and stress less, you can do so in Photography Systems - check it out when you’re done reading this.
Let’s begin.
An Introduction to the X100VI
Let’s start with an introduction.
What do you need to know about this camera?
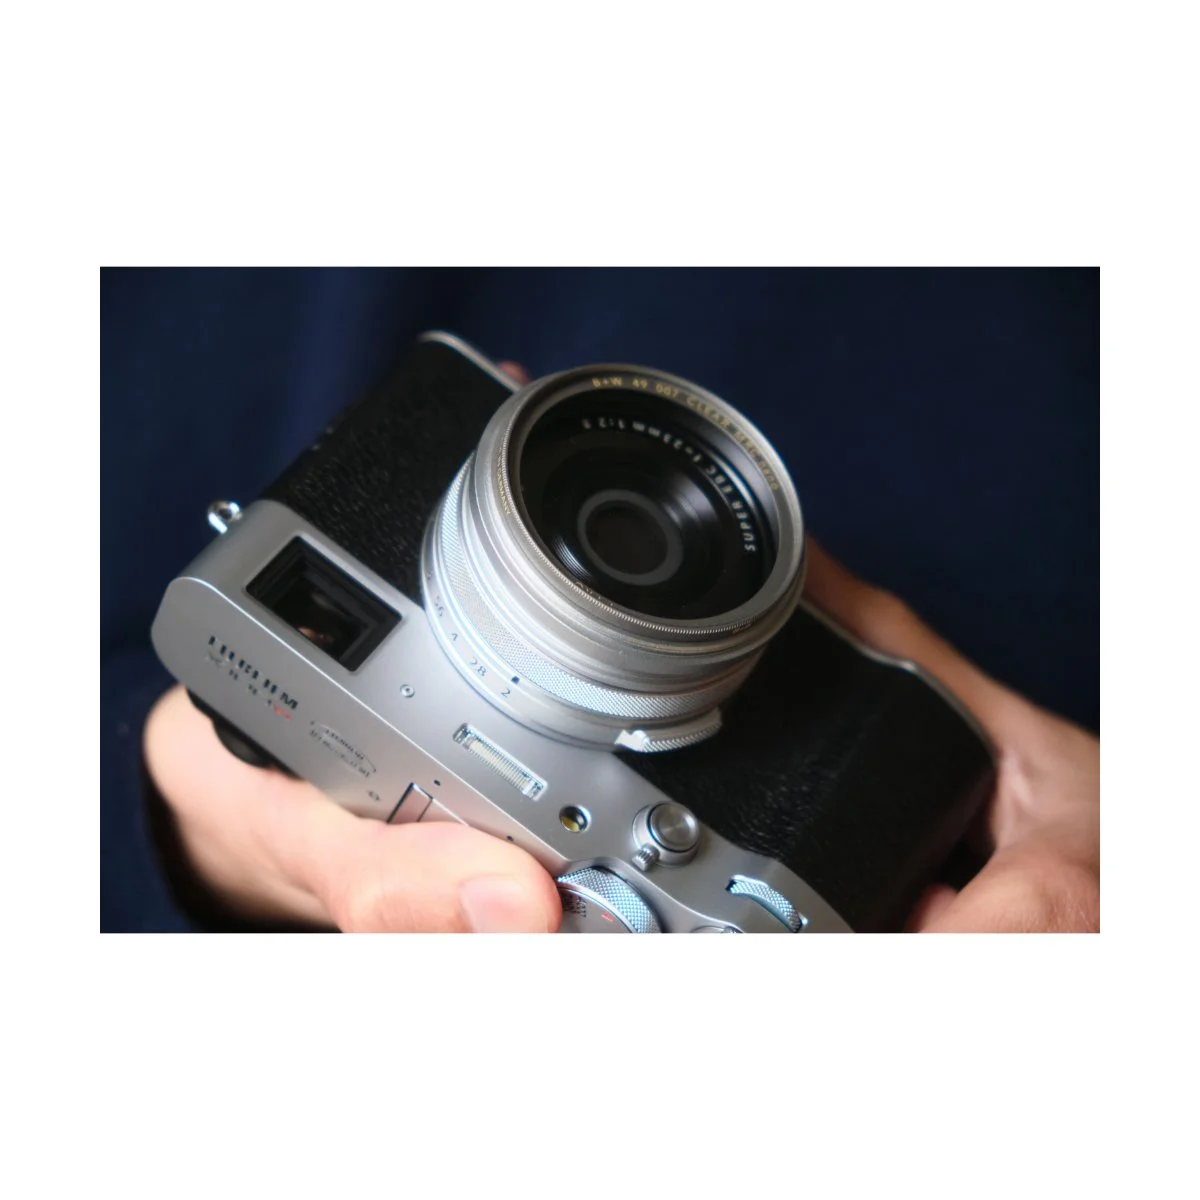
The Fujifilm x100vi is a premium compact point and shoot.
Like many other Fujifilm cameras, it has manual dials and controls.
This is reminiscent of the film era, where cameras didn’t have digital touchscreens and buttons to change the settings.
Yet at the same time, everything about the x100 (and other Fujis) are modern: SD cards, LCD screens, etc.
It’s a balanced blend of film and digital: choosing to prioritize the user experience whilst being convenient for a modern workflow.
Fujifilm isn’t the only camera company to use manual dials, but I’ve found I like theirs the best.
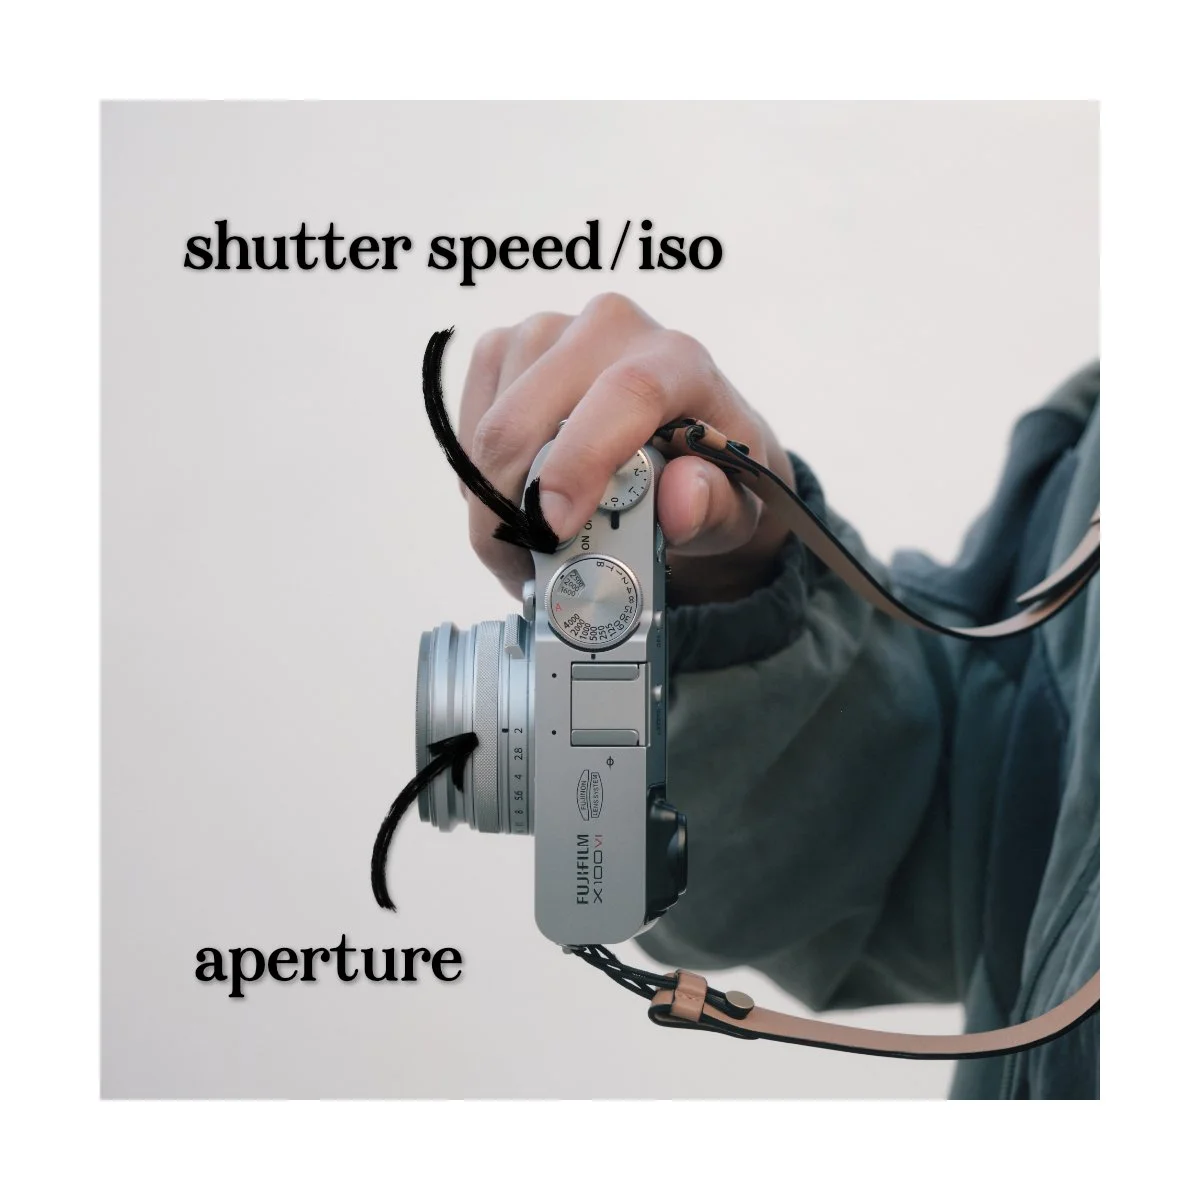
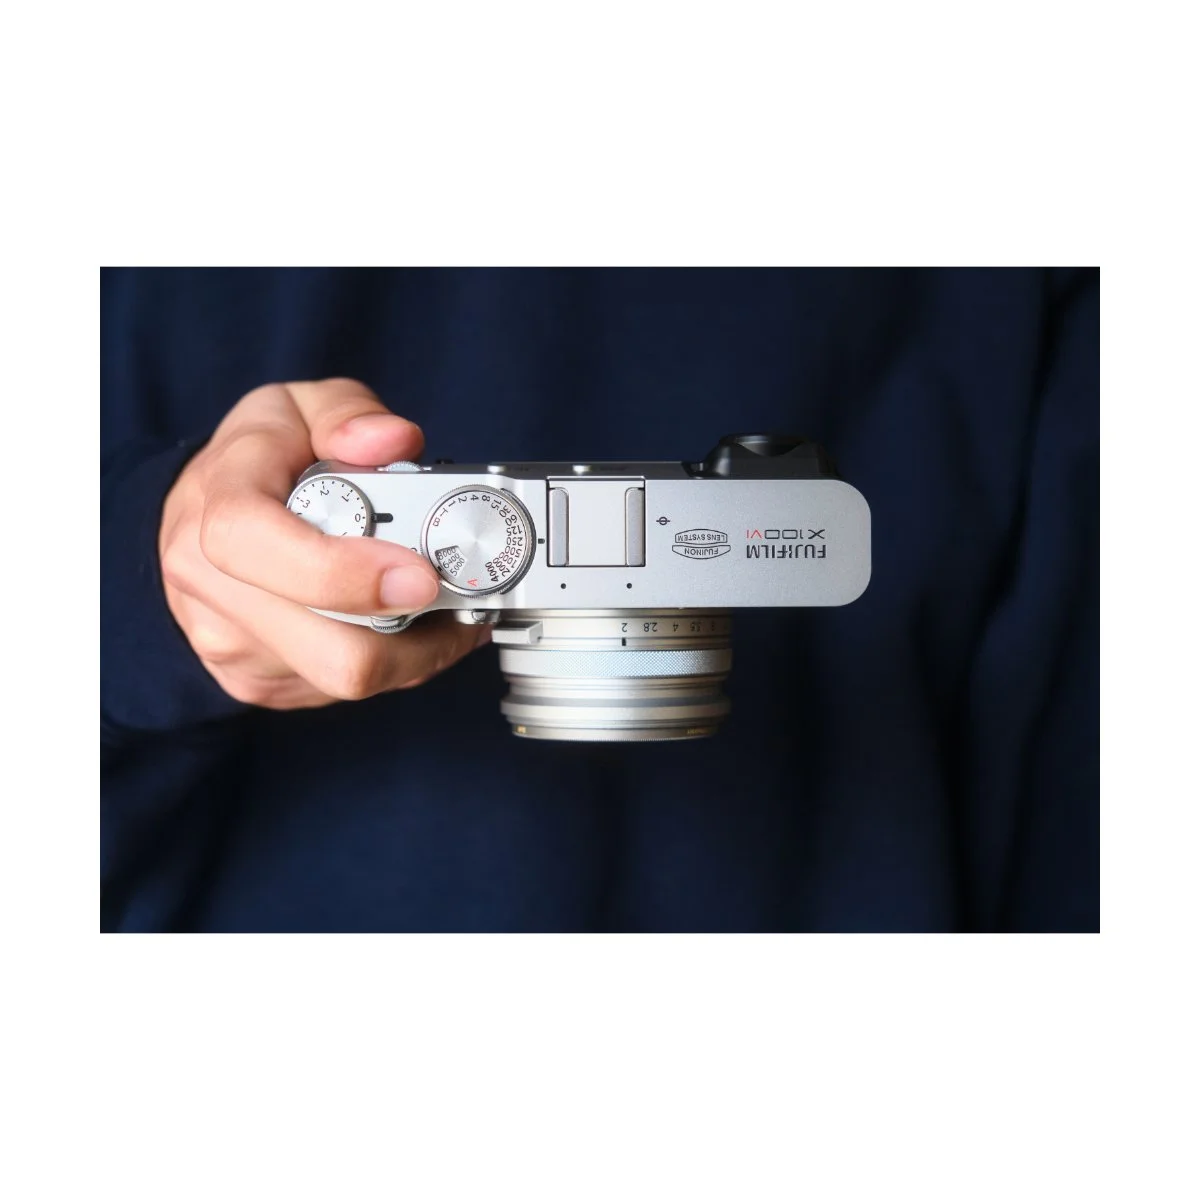
Shutter and ISO on the x100vi are combined into one, making it easy to adjust, aperture is on the lens (as it should be), and there’s no overdoing it.
This camera has all the functionality and customization of buttons, while still keeping a minimal design and saving space.
Now what makes this camera unique from other compact point and shoots are three things:
The fixed lens, the hybrid viewfinder, and the leaf shutter.
Let’s talk about each.
Fixed Lens
Many other compact cameras like the Sony Rx100 series have variable zoom lenses, not fixed lenses.
This makes them more versatile than the x100 series, but it comes with a different philosophy.
For example, one of my first cameras was a Sony Rx100 iii.
I had it before I bought my first Fujifilm but rarely ever used the zoom.
I was a beginner back then, so I didn’t even know it had a true zoom, which didn’t lower image quality like your phone would.
But I got along with the camera just fine, which probably meant a fixed lens camera would suit my photography.
Now, the x100vi technically has a “digital zoom” crop feature, but we’ll talk about that in a bit.
There are some cameras like the Leica Q series, the Ricoh Gr series, and the Sony Rx1r series, which also have fixed lenses.
Whether you prefer those is up to you - but the focal length matters in that decision.
The x100vi has a 35mm eq focal length.
If you don’t understand fields of view, just know that it’s wider than your average “nifty fifty” and tighter than your average smartphone camera.
This is a very natural field of view, closely resembling the human eye.
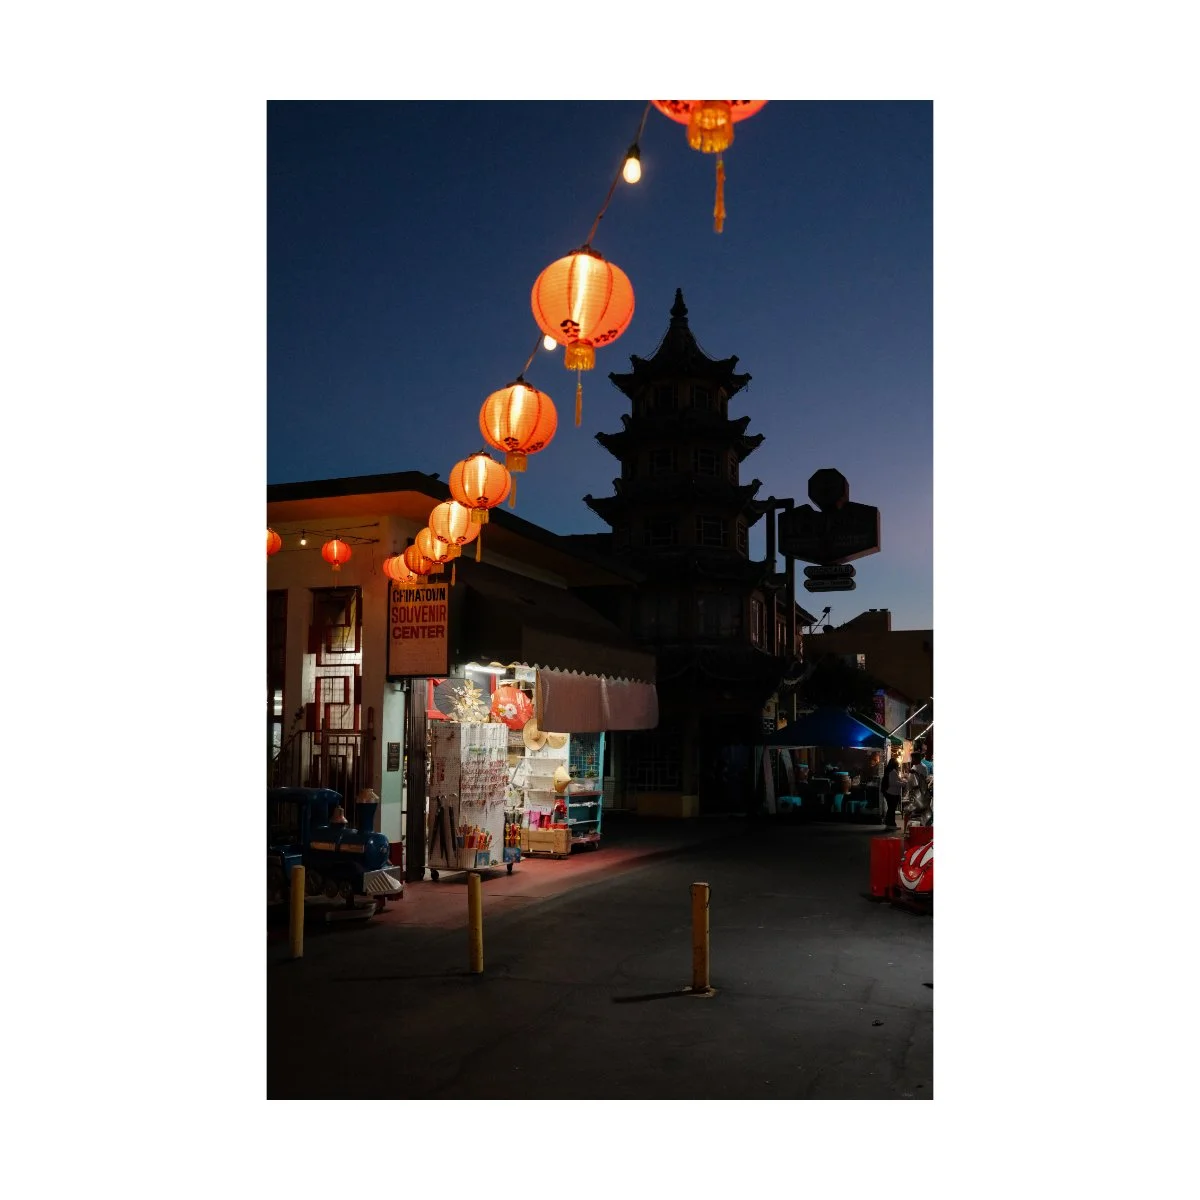
It’s great at capturing everything from everyday to street to travel photography.
For some it might be too wide or too tight, but focal lengths are a preference, and you can learn more about them in my other articles.
I’ll also show you a bunch of examples of how this view looks in different genres of photography in a little bit.
Just for now, note that one thing that makes the VI different from other point and shoots is it’s 35mm eq fixed lens.

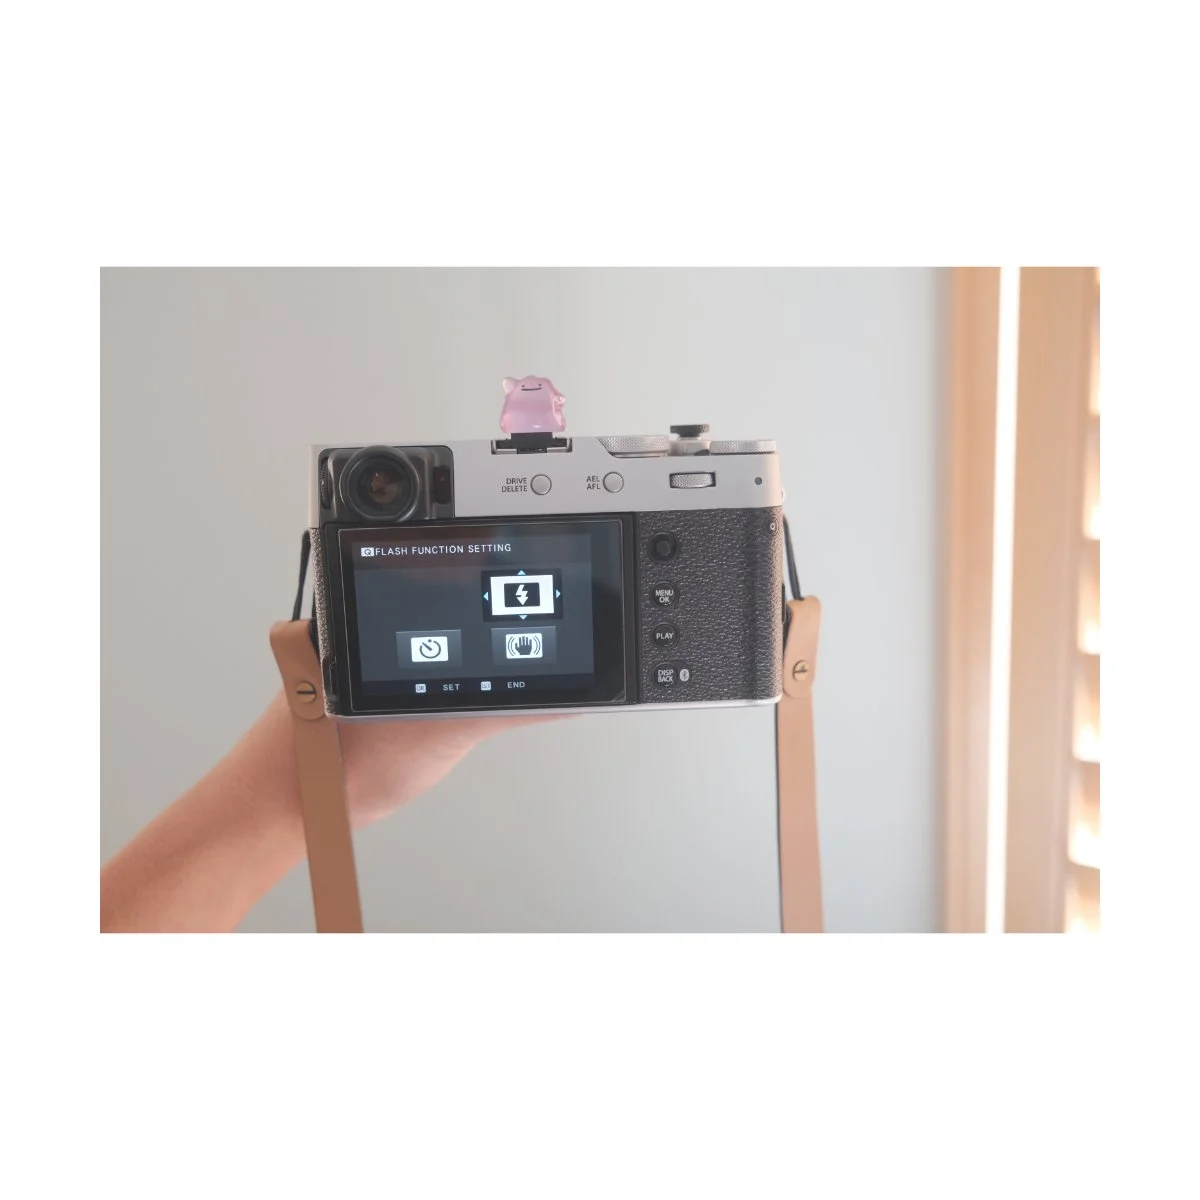
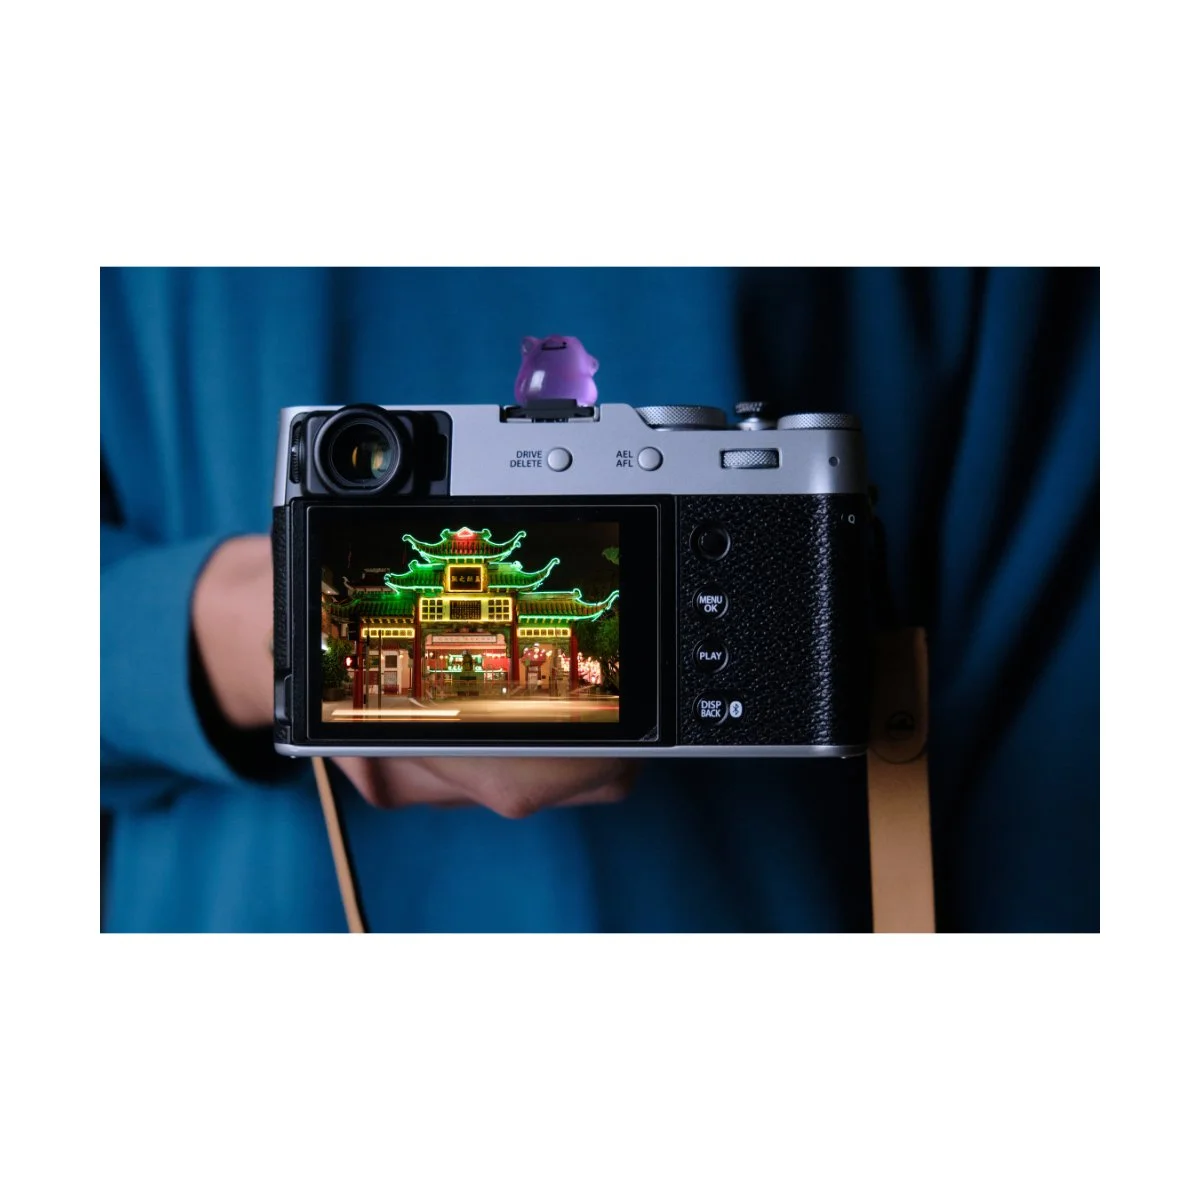
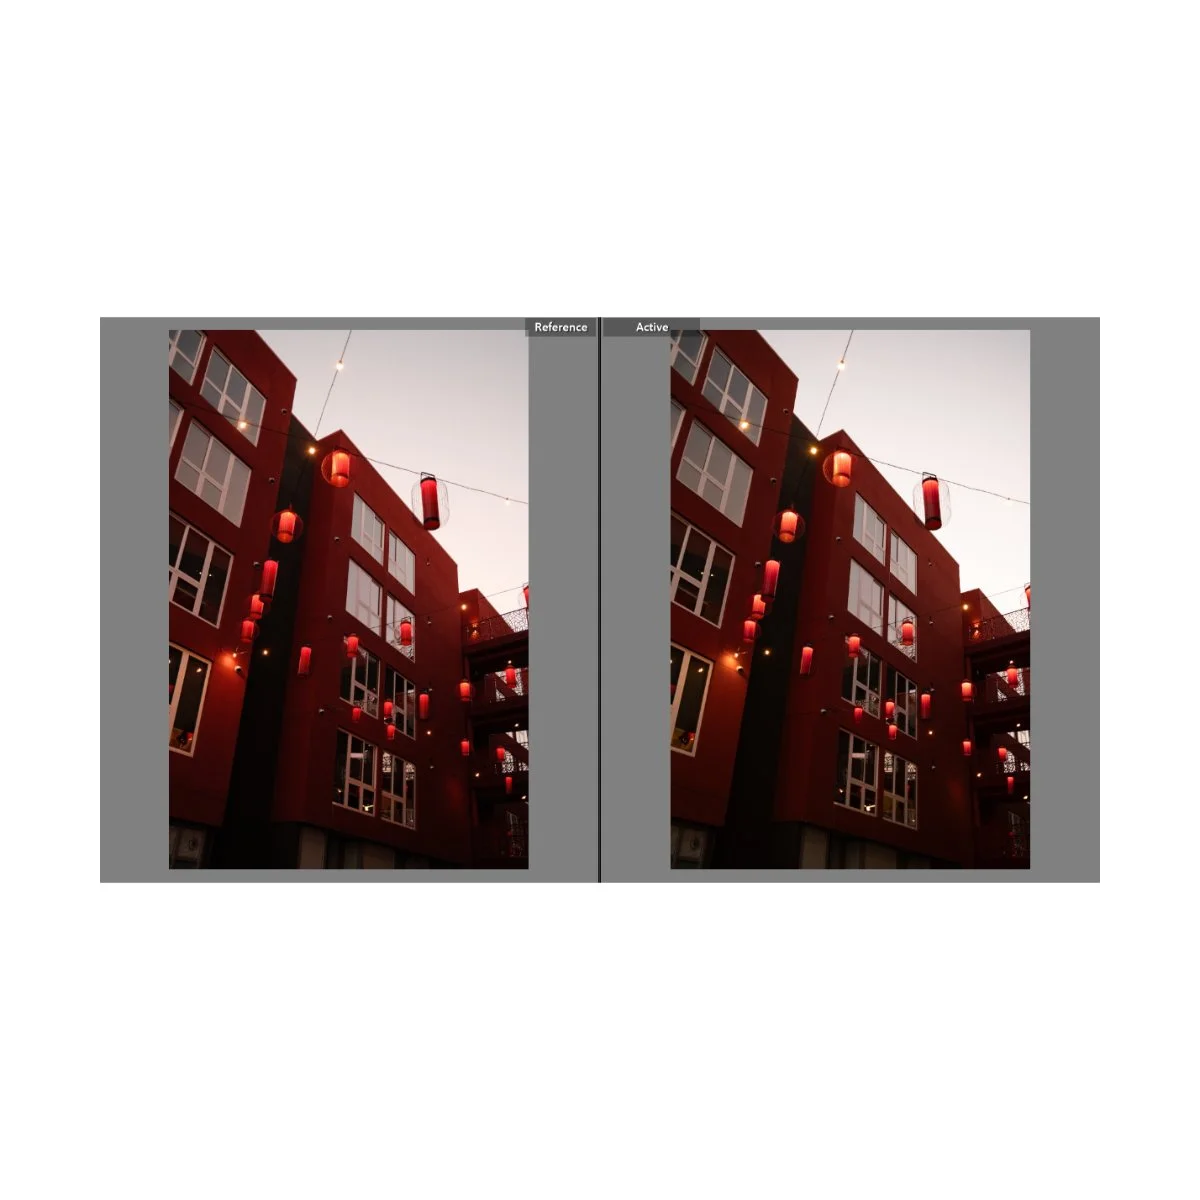
Hybrid Viewfinder*
The second thing that makes the x100vi special is it’s hybrid viewfinder.
Unlike other cameras that only have an electronic viewfinder, this camera also has an optical viewfinder, which you can switch to via the dial on front.
Optical viewfinders allow you to look at the scene, not the shot.
So instead of composing through a digital preview of the image, you’re looking at the actual moment as it unfolds.
What this means practically is that you’ll have less lag between what you see and what happens, it’ll stay bright, and save you some battery life.
Furthermore you can see some of the scene outside of the frame which might help when predicting subjects entering shots.
If you’ve never shot on a optical viewfinder before, it’s not for everyone.
Some people love it, other’s don’t really need it.
I personally use the electronic viewfinder 90% of the time, but switch to the optical one if I feel like mixing things up.
But it’s a really neat feature that the x100 has that other similar cameras don’t.
Leaf Shutter
The final thing that makes this camera unique is it’s leaf shutter.
Leaf shutters are camera shutters built inside the lens and they work differently than common focal-plane shutters.
Without getting technical, what you need to know is that they’re extremely quiet, they eliminate rolling shutter distortion, and they can sync to higher flash speeds.
The quietness makes it better for things like street or documentary photography.
Eliminating rolling shutter distortion means you can take pictures of fast moving objects and not get jello or weird warping.

And syncing to higher flash speeds means you can shoot flash with a high shutter speed during the daytime, if you’re into that.
Because the shutter is inside of the lens, it’s more common to see leaf shutters in fixed lens cameras like the x100 or Ricoh Gr series.
So that was an introduction to the x100vi and what makes it unique and different from other similar cameras.
Now, let’s talk about some of the impressive modern features this camera has.
Modern Features on the VI
The x100vi, although made for a great shooting experience, doesn’t slouch when it comes to image quality.
Many other cameras will prioritize the “fun factor”, focusing on aesthetic design and filters rather than delivering high-quality images.
Because building a camera that takes high quality images will be more expensive and costly.
The x100vi on the other hand doesn’t compromise on image quality.
That’s what makes it a prosumer camera rather than a consumer one, and the price point comes with it.
Let’s talk about some of these modern features and how they work in practice.
Sensor
The x100vi has a 40.2MP X-Trans CMOS 5 Sensor paired with an updated X-Processor 5.
This is an APS-C sized sensor, meaning smaller than full frame, but bigger than everything below.
In my opinion, it’s the right sized sensor to keep the camera small while maintaining a professional look.
40MP is enough to keep the camera competitive with the rest of the market, although not completely necessary.
I mentioned in my previous article More Megapixels, More Problems, that there are downsides to having more megapixels - and most people don’t need them.
You can however, be assured that none of your images will look cheap or low quality.
Although I’m still learning more and more about this camera, I find the sensor’s look to be quite nice.
While images taken with the x100v give off a more natural high quality film feel, shots on the VI are cleaner, sharper, and crisp.
Which aesthetic you like will depend on your tastes - I find both appealing in their own way.
There are other benefits to having more megapixels like the flexibility in post, room to crop, and ease of printing.
But that’s often a user specific need, and I think most people would get along well with either the VI or V.

Autofocus
Autofocus on this camera is a bit better than the V, especially when it comes to face and eye tracking.
It’s more accurate, holds a little longer, and better in low light.
Now typically, I don’t use continuous autofocus mode, so it doesn’t make a huge difference for me.
Personally, I like to shoot in single autofocus with a focus area on in the center.
Then, I’ll pick out what I want to focus on and then drag my frame to the correct composition.
This gives me the most consistent and accurate results for my style of shooting.
I don’t have to worry about the camera picking up or focusing on the wrong thing.
I’m forced to think about what I want to focus on prior to the shot.
And, the camera feels more true to a point and shoot style this way.
Again, it’s preference, and I think most people would be fine with just letting the camera track for them.
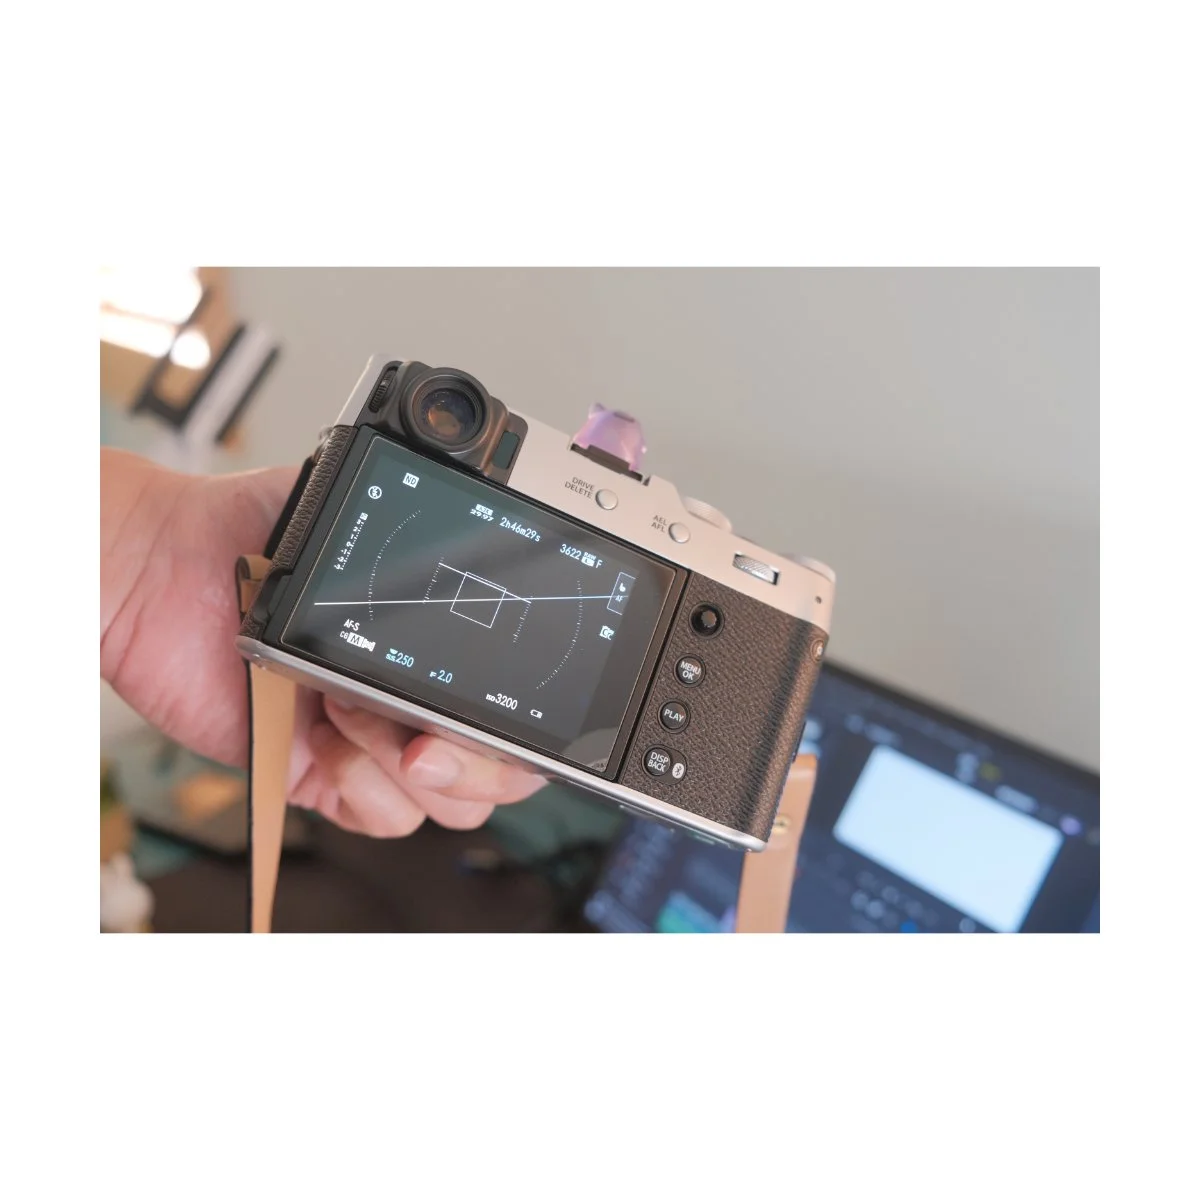
IBIS*
A big update on the x100vi was the addition of IBIS.
Stabilization was a heavily sought after feature, since it could mean better lowlight performance as well as more stable handheld video footage.
Furthermore, many other compact point and shoots on the market already had some form of stabilization, so the x100 series felt lacking in that regard.
Now it’s not perfect, and I covered my problems with the IBIS in my 1 year review.
Using it for photos was a little buggy and you had to be careful if there’s a lot of movement in your frame.
Too much movement will make the camera try to hold a moving subject in place - which will result in a photo drag or a tiny blur when you zoom far in.

In my opinion, you should always prioritize a faster shutter speed to capture moving subjects.
So if you’re shooting lowlight, be careful when photographing motion, unless that’s the point.
Now for video, IBIS is decent.
If you’re holding it still, it does well to eliminate shakes and bumps, but if you’re not careful warping can occur.
If you want more leeway, I’d recommend shooting in 4k or even 1080p, and not 6k, as that’s too much for the camera to handle.
Or just use a tripod.
Overall, IBIS isn’t perfect, but that’s okay.
It’s not the main point of this camera, still a cool feature, and will probably be improved upon in the future.

Video*
Long ago I made a video talking about how the x100v was an underrated video camera.
It had really good 4K specs, 10 bit 4:2:2 with an external recorder, and a great color profile: Eterna.
And for a long time, I used this camera to record talking head videos for my YouTube channel.
The x100vi, is that but more, and honestly feels a bit overkill.
It has 6k, 10 bit 4:2:2 internally, great slomo, and even IBIS.
But to be honest, I never shoot in 6K - 4K is more than enough for me and my computer can’t handle the higher video specs anyways.
It also gets hot much faster, so I prefer to use the X-T4 for video.
So the point is, the VI is great for video.
It has it’s limitations based on it’s build and intent, but you can use it like a hybrid B camera if you want.
Real World Photography w/the x100vi
Now that we’ve both introduced to you the camera and brought you up to date with it’s capabilities, let’s talk about how it handles in the real world.
The Fujifilm x100vi is primarily a photography camera, but it’s versatile for many different genres, and how you use it will depend on your personal needs.

Everyday Carry
In the past, it would only take one glance at the VI to say, “That’s a street or documentary camera.”
It’s portable, stealthy, looks casual, quick, and has a fixed prime.
But nowadays, since the mass market appeal has expanded, you can use it for a lot of different things.
One such thing I think most people treat the x100 series as nowadays, is an everyday carry.
Because of it’s look, style, and film simulations, it’s kind of the perfect camera to bring with you on a Saturday morning to the coffee shop.
That’s initially what I bought this camera for: as a casual means to document my everyday life.
I’d bring the V on road trips, casual hangouts, and parties where I could photograph the fun or dumb things me and my friends did.
And it was a great entry into photography without needing to overcomplicate it.
I mentioned this in my 2026 Buyer’s Guide article, but the great benefit of having a fixed lens is that the focal length is decided for you.
A lot of beginners get confused about which is the best focal length for them and it takes a lot of trial and error to figure that stuff out.
But a big reason the x100 has gotten popular with casual photographers is because they can pick up the camera and get pretty decent shots without having to know too much about photography.
In fact, I’ve handed both the VI and V off to many different people who’ve had no experience with photography, put their settings to auto, and they took some great images with it.

Now if you’re trying to actually learn photography, understanding the different focal lengths through a zoom lens is preferred.
But not everyone needs that.
So if you want something casual to bring around on your day to day and document or take pictures of your life, the x100 is perfect for that.
It gets high quality images, looks good, and is still the camera I get the most compliments on.
Take that for what you will.

Portrait Photography
Not a lot of people will look at the x100vi and say it’s a good portrait camera - but I’d beg to differ.
In fact, there are examples everywhere online of people who’ve used the x100 series for portrait sessions and even weddings.
I think the main confusion is that the 35mm eq focal length is not widely regarded as a “portrait lens”.
Most would look to the 75 or even 50mm equivalents because they’re closer up, have a preferred compression, and more bokeh.
But that’s just one side of portrait photography.

The x100 series, and really any 35mm eq, are great at what you’d call “environmental portraits”.
Meaning: photos that involve some bit of the background, the scene, and other bits and pieces of context.
Because it’s slightly wider, it includes other elements in the shot, and the photographer has to play with that.
Of course you can step a little closer to mimic a standard 50mm look, but I’d recommend otherwise.

If you’re used to a nifty fifty and you want to understand the 35mm eq better, try taking a step back and composing the shot as is.
You’ll realize you’ll have to frame and compose your subject in such a way where the outside elements are involved.
And it may mean getting the subject to stand a different way or interact differently with the world around them.
It’s not going to replace your 50 or 75mm but when used right can complement your other photos very well.
Now I’m not a portrait photographer, but that’s part of what I’ve learned from using this camera so much.
And the look of nailing a shot with the 35mm subject properly situated in the environment and with the right depth of field is one of the most satisfying feelings.
It’s a big reason why this it’s my favorite focal length.

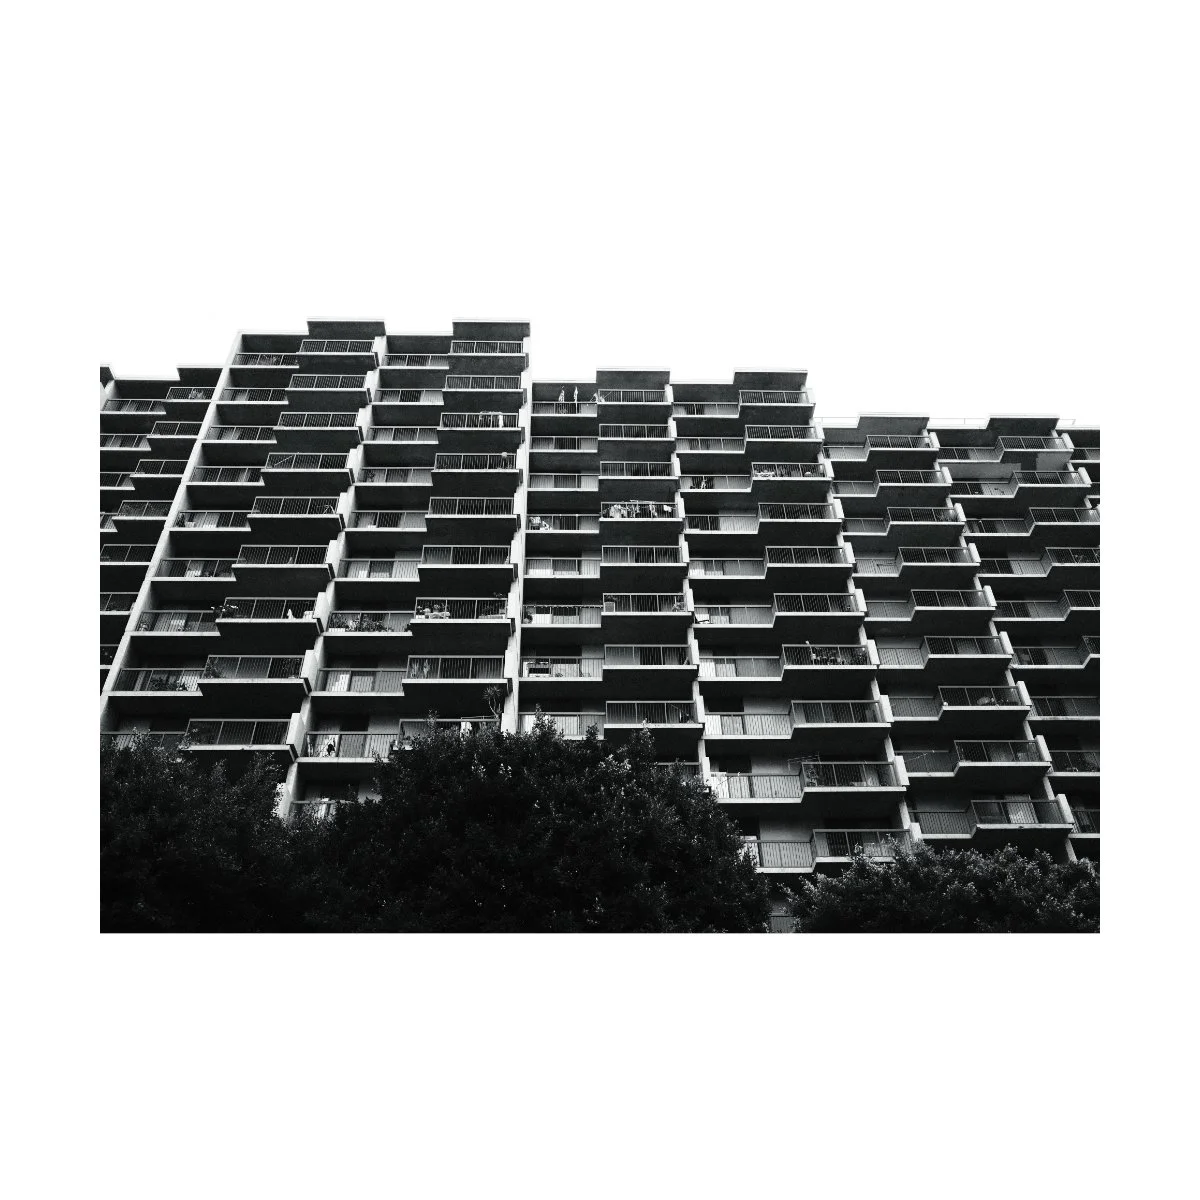
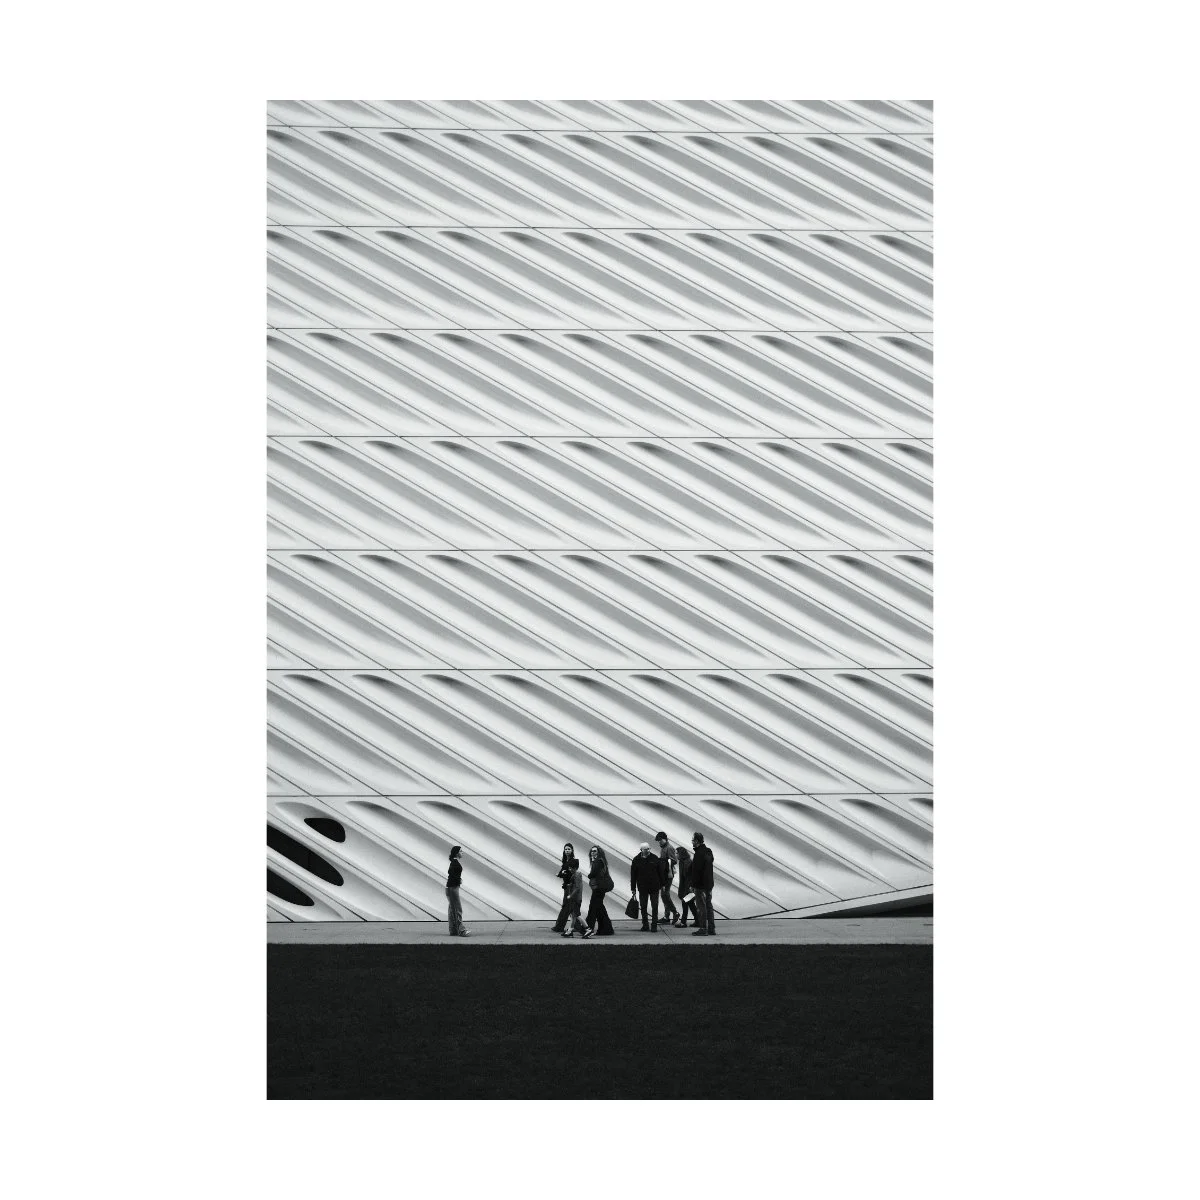
Landscape Photography
Honestly speaking, landscape photography is a bit of a hit or miss with the VI.
Because of it’s fixed focal length, it’s not always the best choice for the shot.
And unlike other photography genres, it’s not like you can just walk closer or further to make the shot work.
In real life, that can mean a difference of miles from here and there.
So for landscape photographers, zoom lenses are always going to be preferred.
Something with a range to capture the wideness of the expanse or to get close up details of a mountaintop or canyon.
If you’re bringing this camera along with you on a trip however, it could be a good B cam, allowing you to easily document the hiking or camping moments.
And sometimes you will find yourself setup in a spot where 35mm is just right.

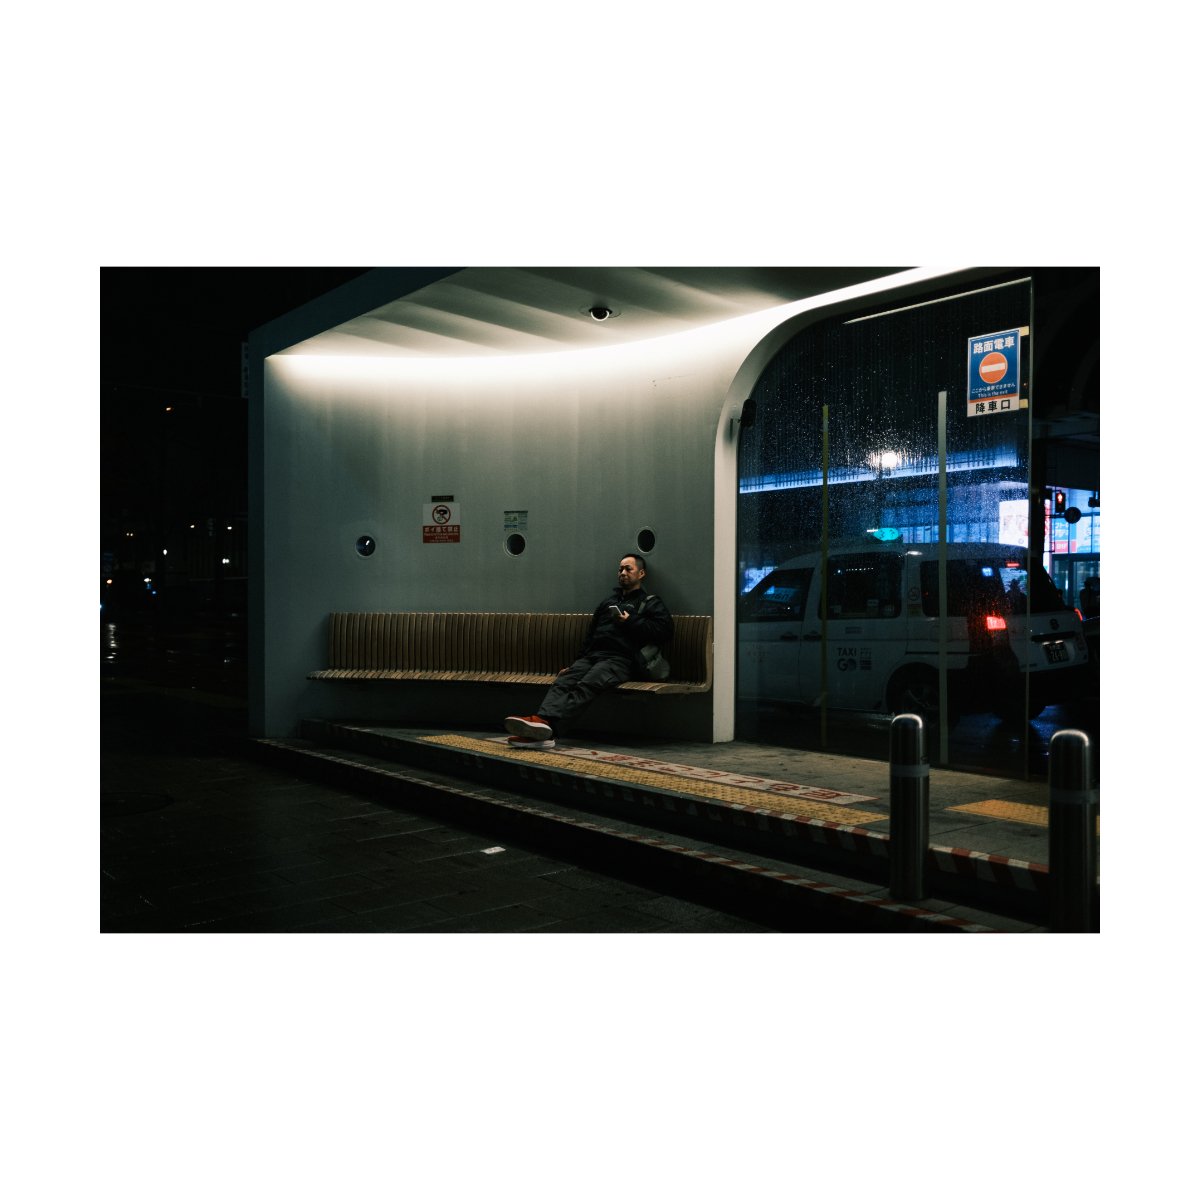
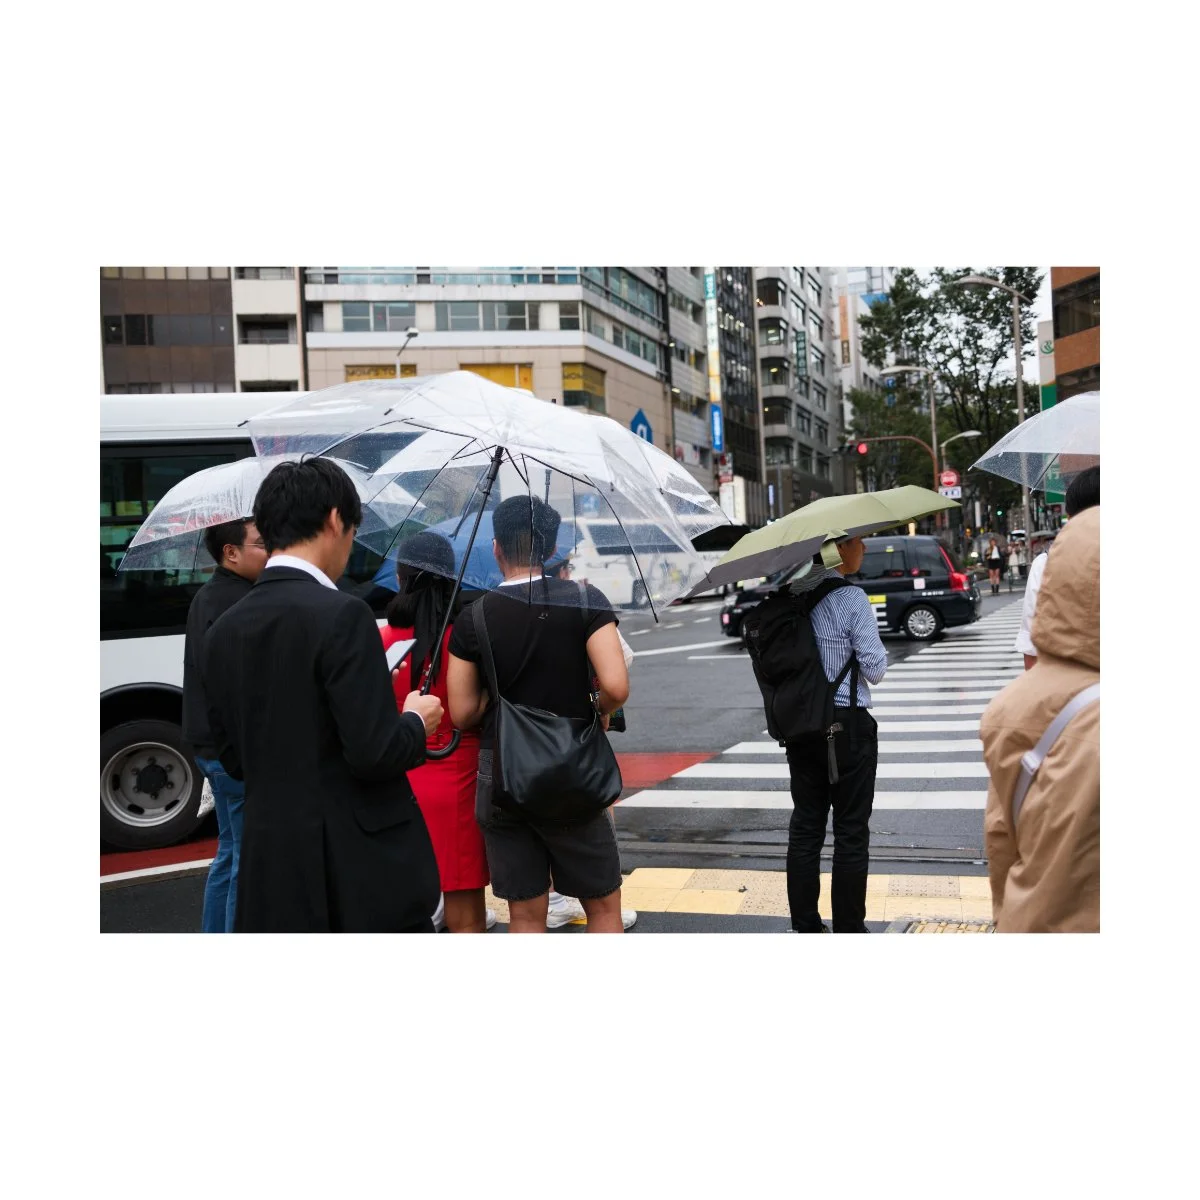
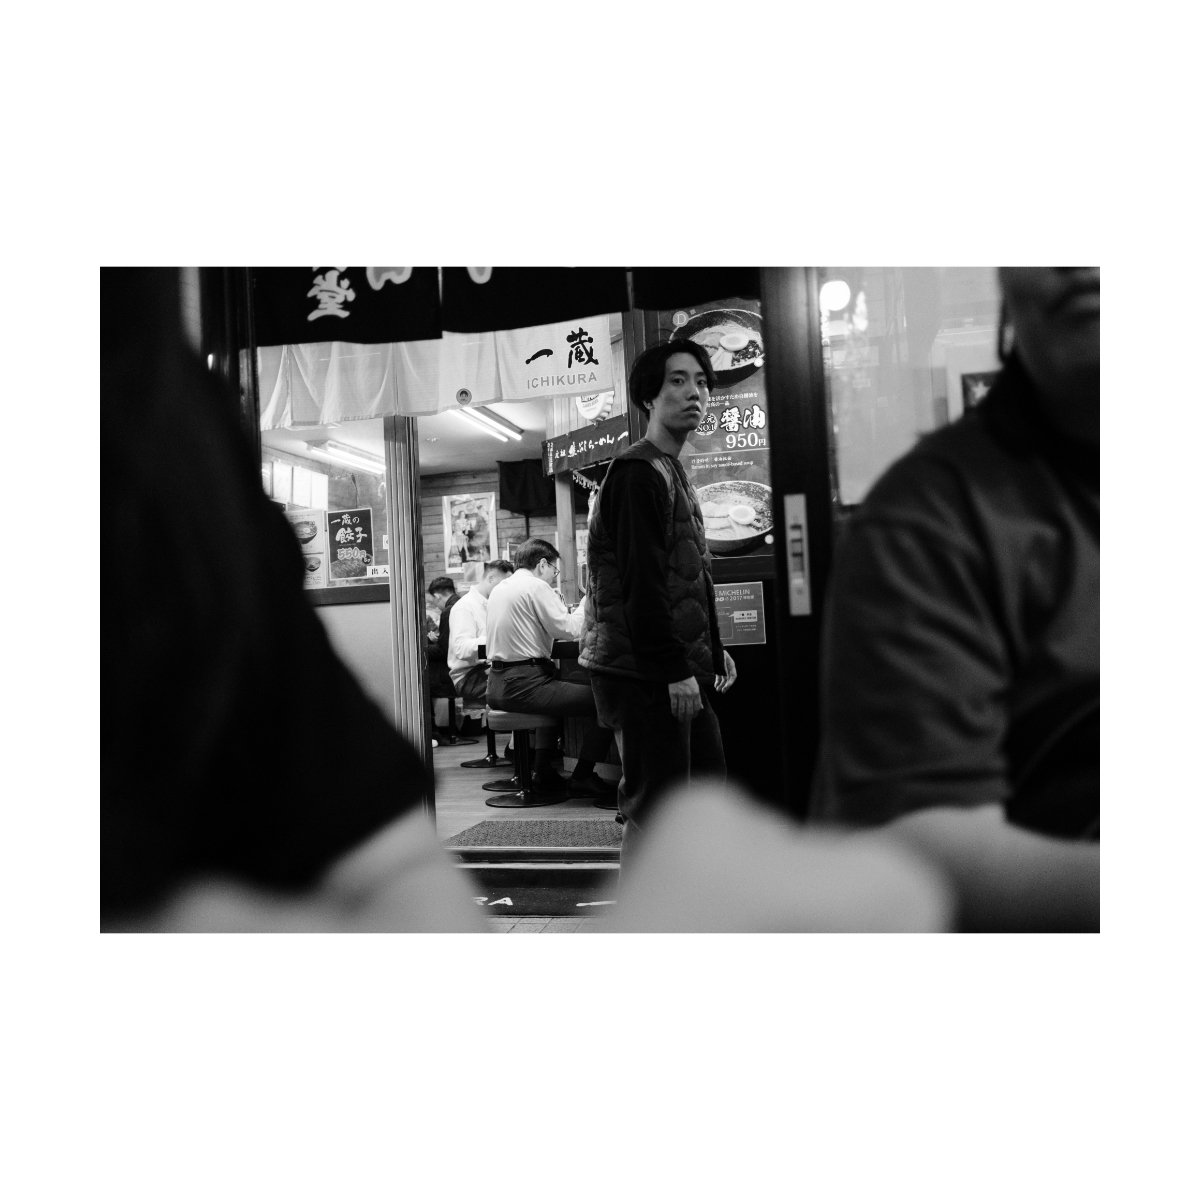
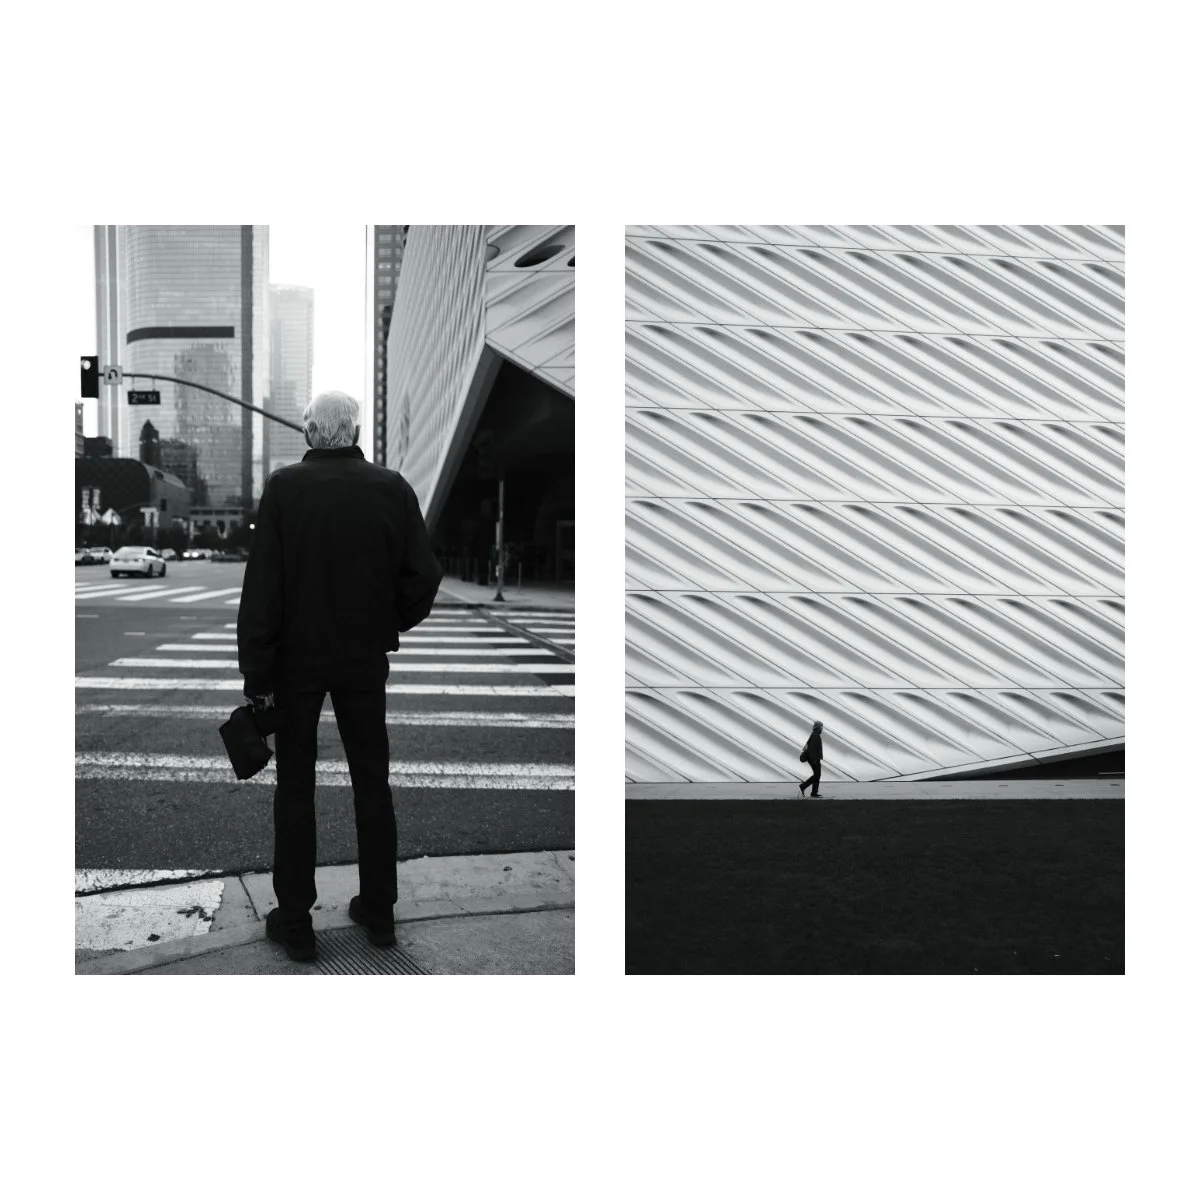
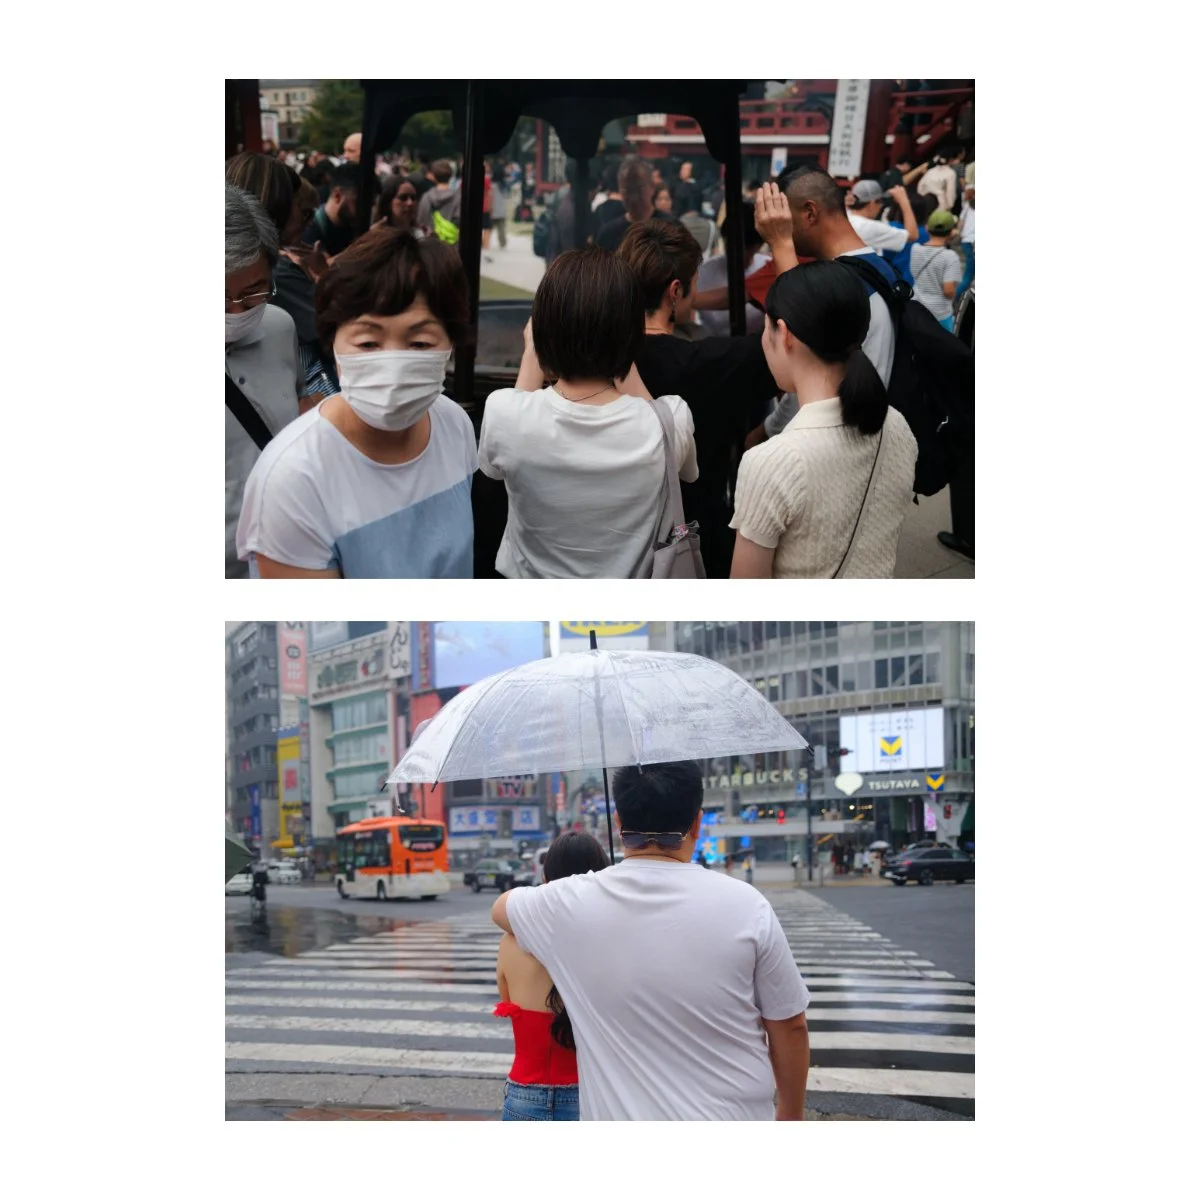
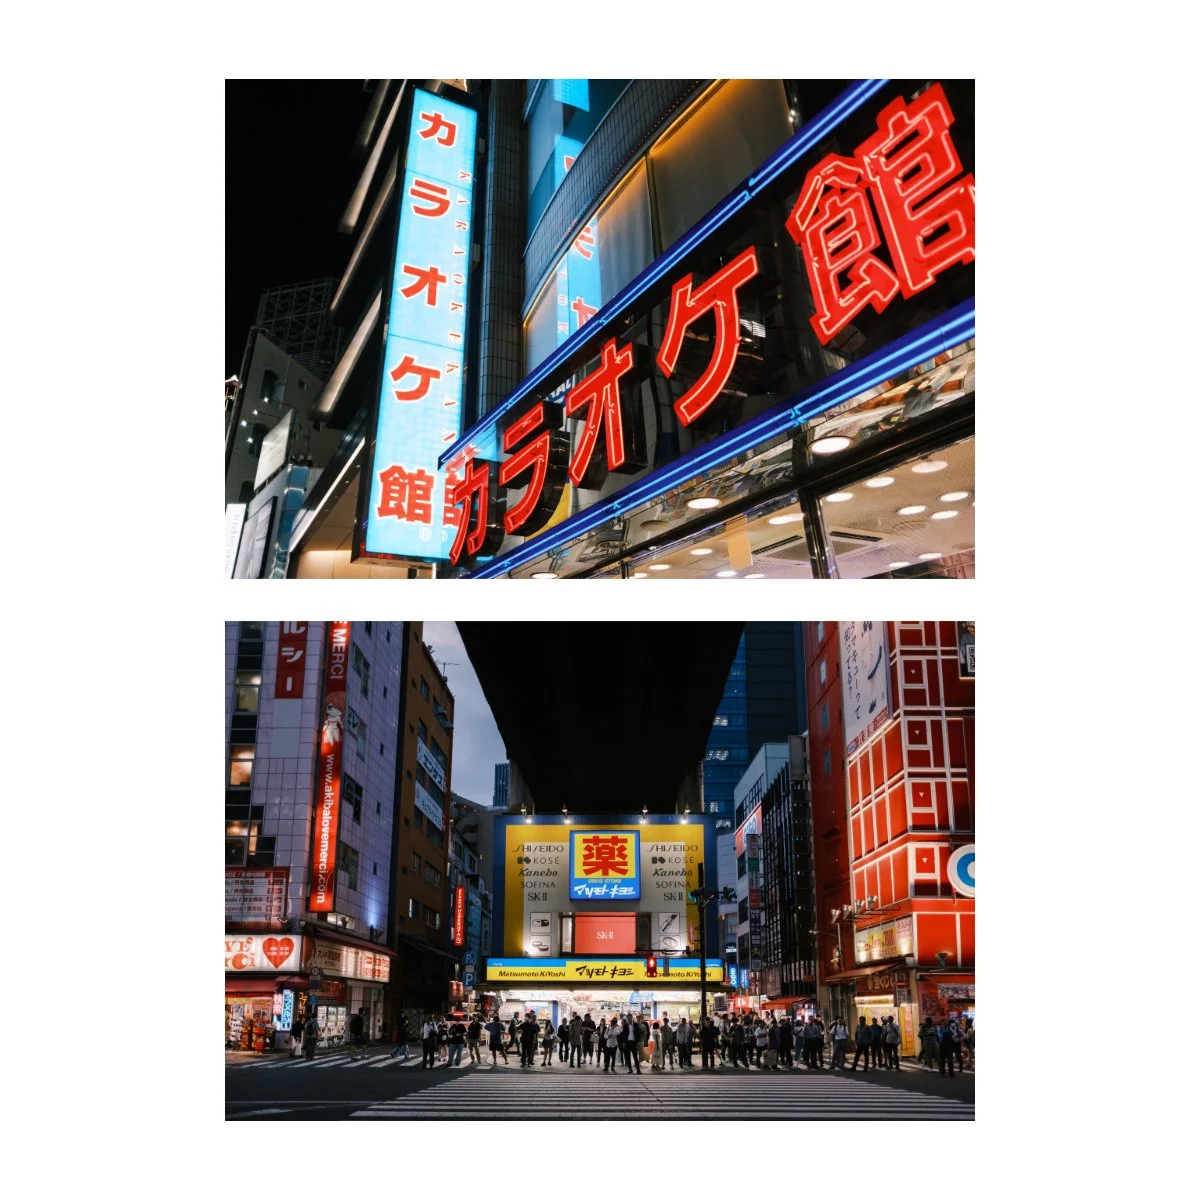
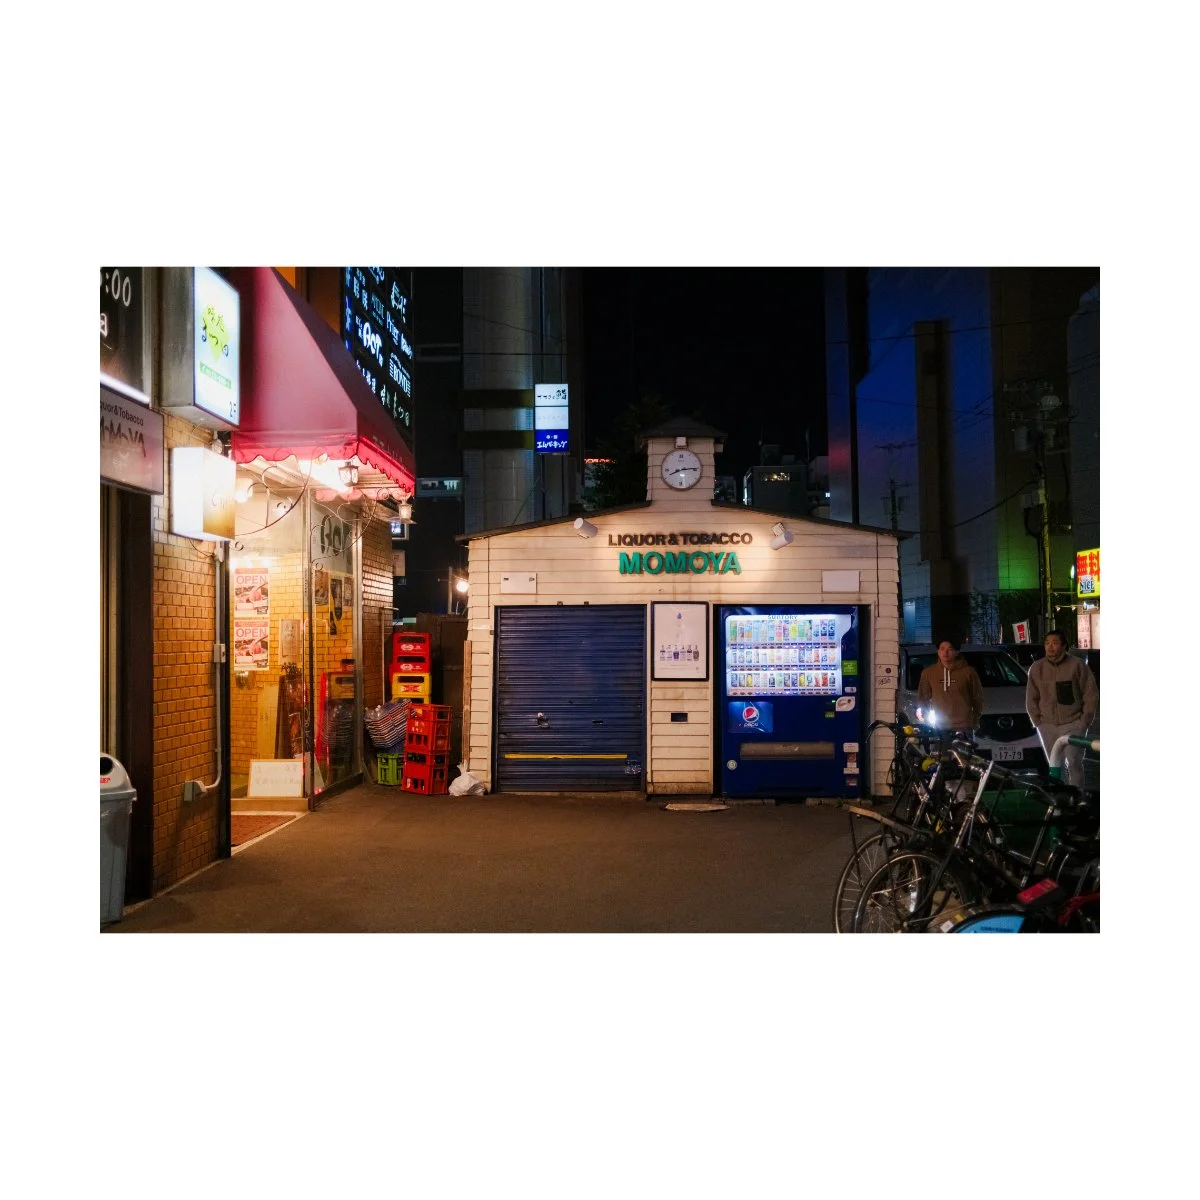
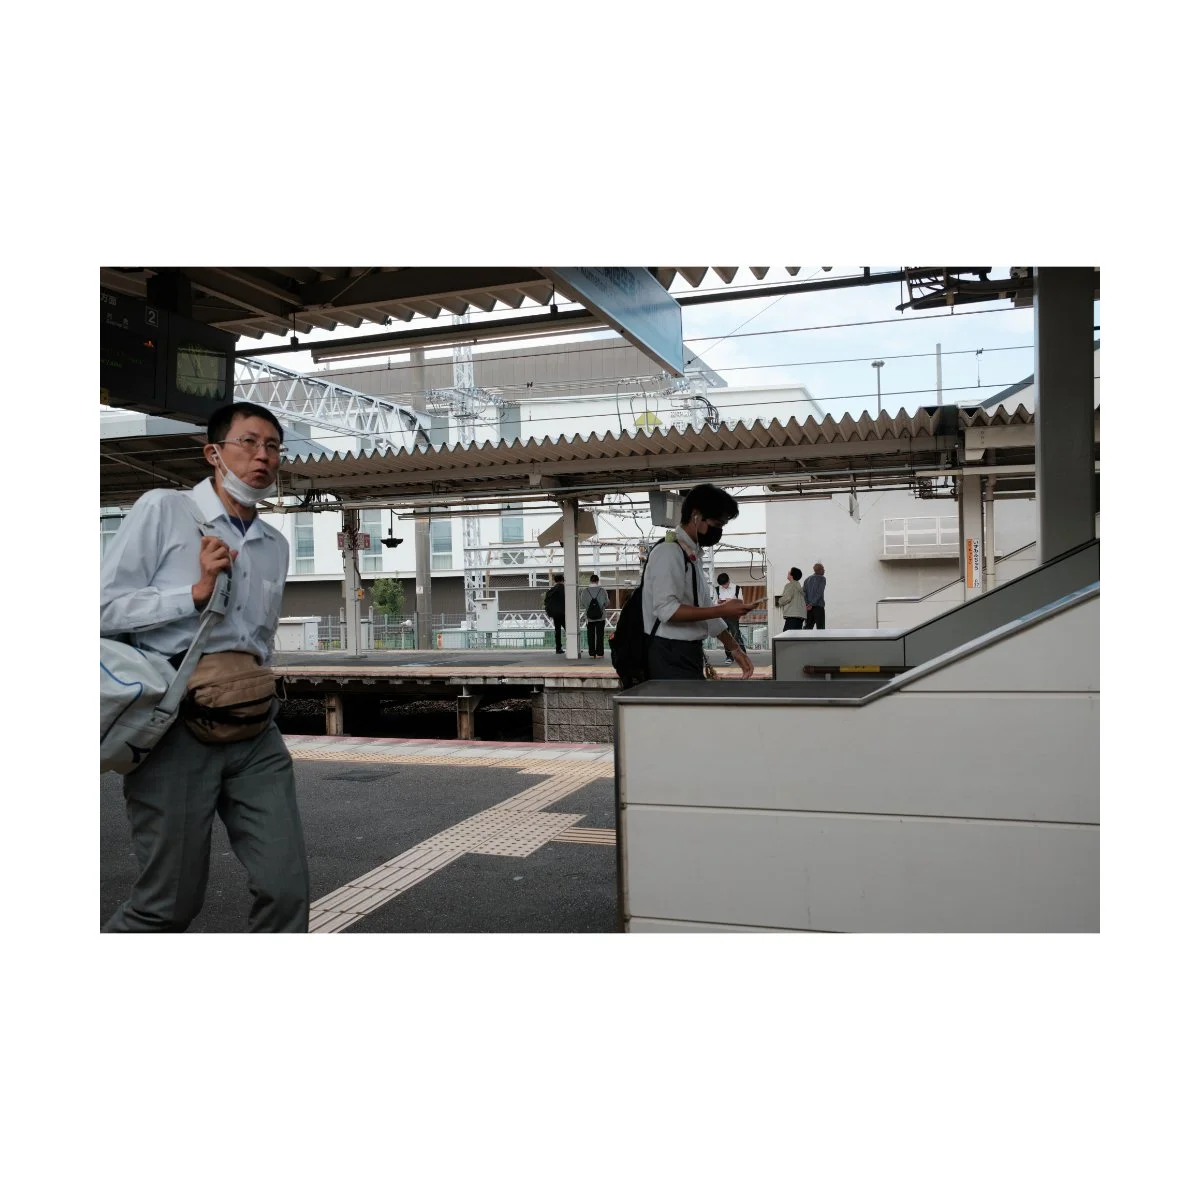
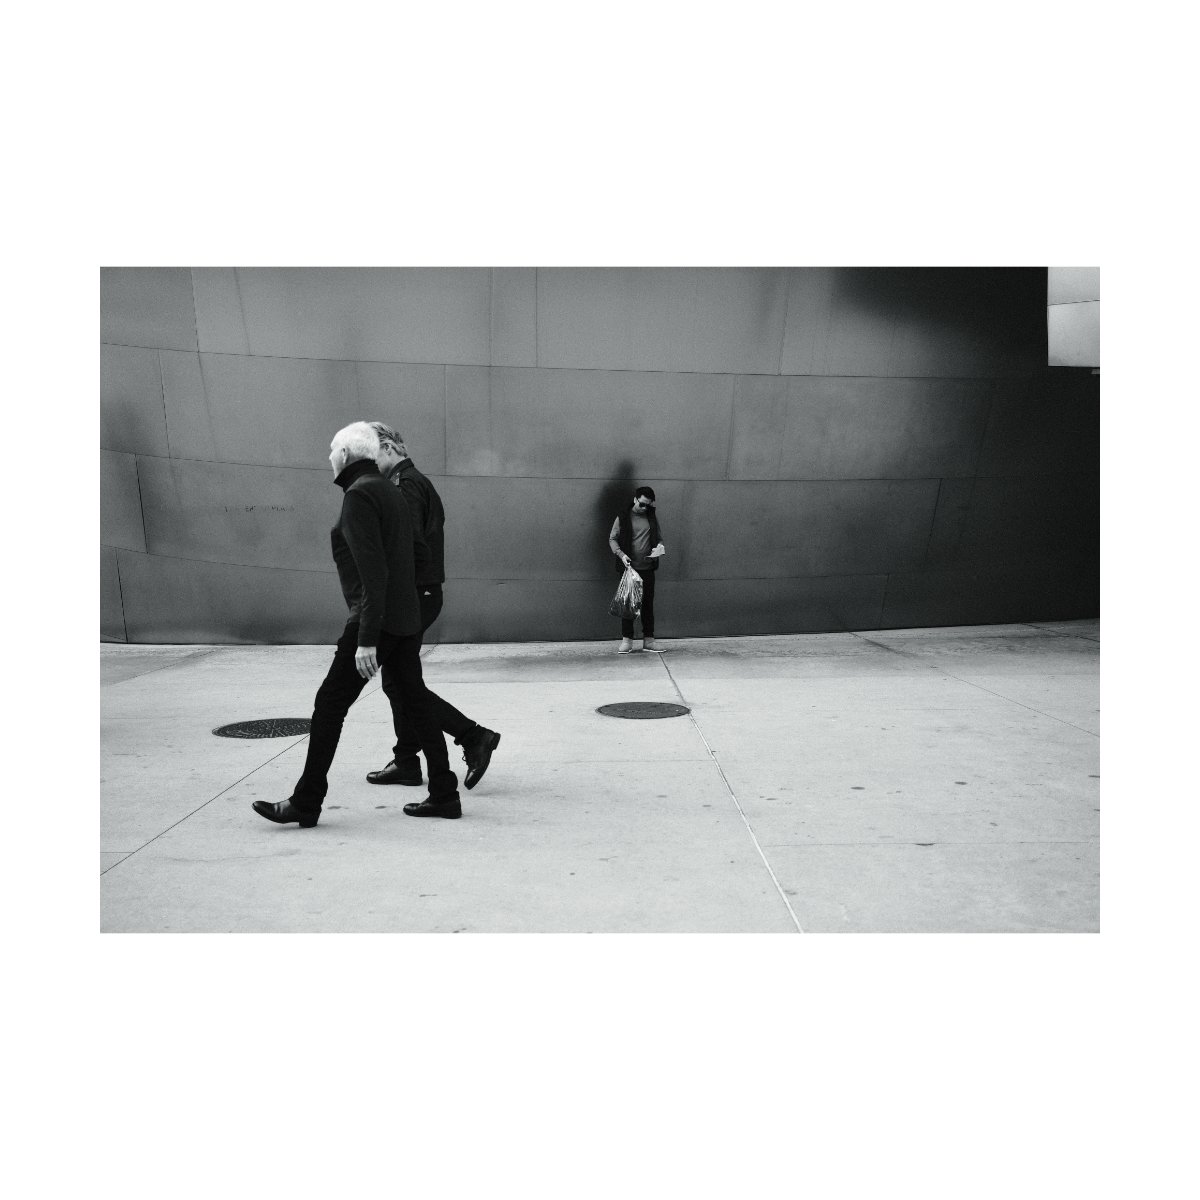
Street Photography
Street photography with the x100vi is a no brainer - this camera was built for it.
It’s ease of use, quiet leaf shutter, normal casual appearance, and portability makes it great for slinging around your waist and exploring the city.
Furthermore, the focal length is perfect for getting more intimate street photos.
Obviously the focal length you shoot at for street photography will depend on your preferences - whether you like to capture things from up close or from afar.
Me personally, I’m not the best street photographer, and admittedly, I could get better results shooting from afar.
This is because I’m not an “in your face” type of street photographer - I don’t want to invade peoples bubbles and I’m a bit hesitant to approach and get close.
Because of that, shooting with the VI is a potential hit or miss.
The frames that will look good in this focal length with the way that I shoot are few, and I might be better served with a tighter lens.
So one could view the VI as something that conflicts with my nature or something that forces me to get out of my comfort zone.
A negative or a positive depending on your perspective.
To be honest, the main reason why I keep shooting with the VI, even though I could potentially use something tighter and get better results, is because I love the look of it.
The 35mm eq, when captured right, has a great aesthetic.
It feels like you’re in the mix, part of everything, close and personal, without having that extended wide-angle distorted look.
And there are many situations and scenarios where I’d find myself up close and photos are actually easy to get.
Take for example, these photos taken in the street markets of Battambang, Cambodia with the V.
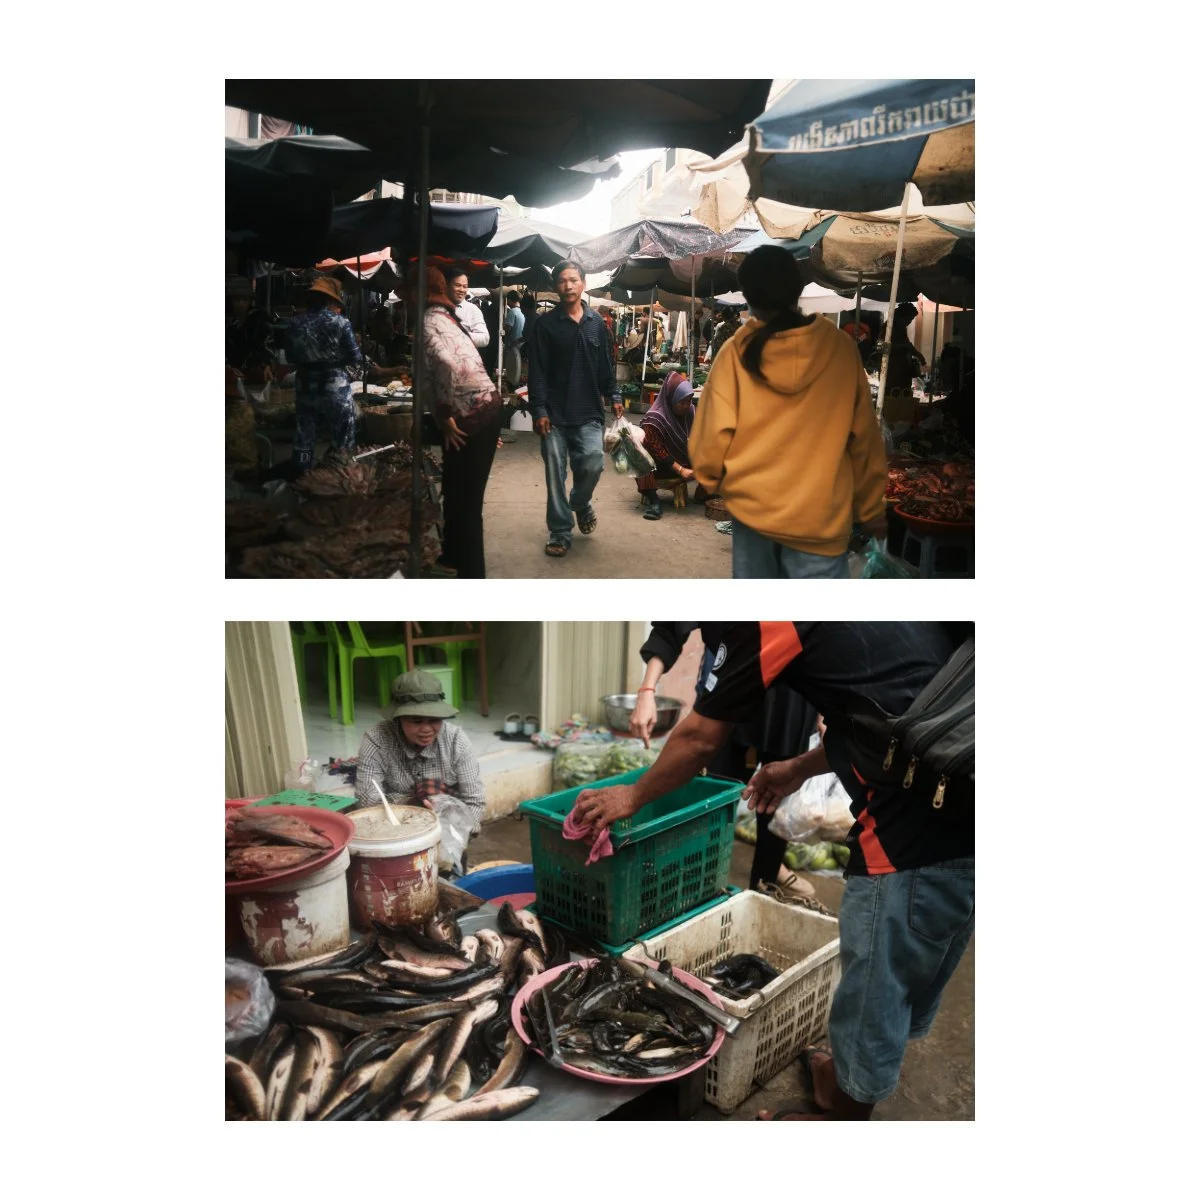
The walkways there were small and crowded and I had no choice but to be that close.
But I also didn’t feel weird about taking pictures near everything - partially because everyone was already in everyone’s space.
So photos were easy to get and they looked good - a perspective I wouldn’t be able to get with a tighter lens.
So admittedly, although I’m not the biggest fan of crowds or getting up front in people’s way for street photography, the look of the 35mm keeps bringing me back to it.
It’s something that I’m willing to forsake personal comfort and even my personal nature to capture.
Currently, I’m still trying to figure out a way of getting close without being intrusive.
I’ve seen other photographers who just walk up to people and snap at their faces and…I’m not about that.
But I think as I work on it, I’ll get better, and I’ll find new ways of getting better results out of the 35mm for street photography.
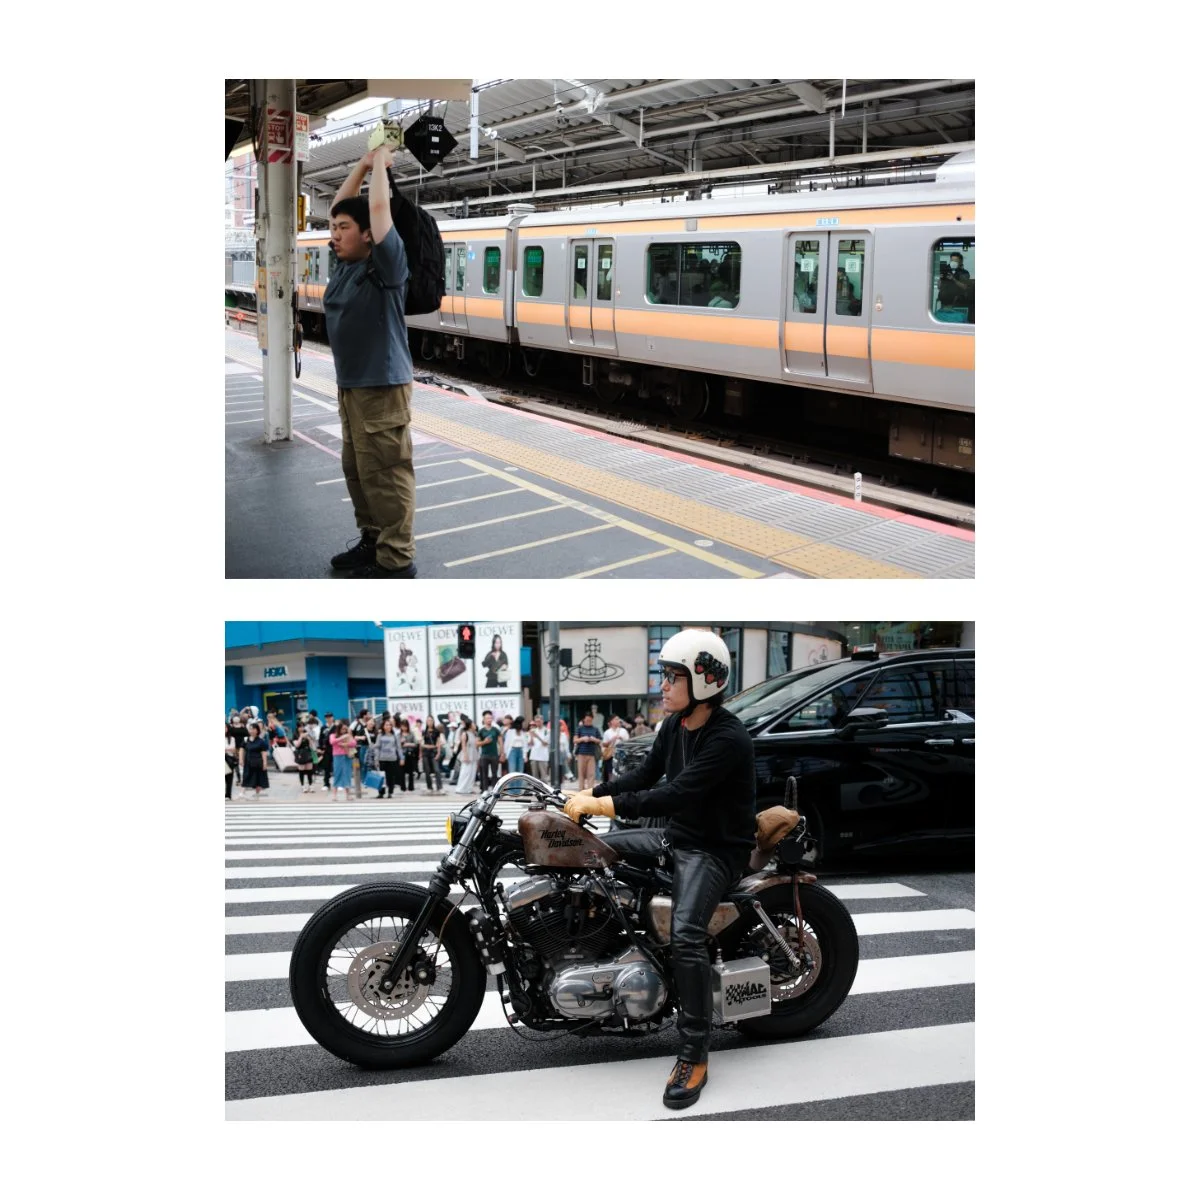
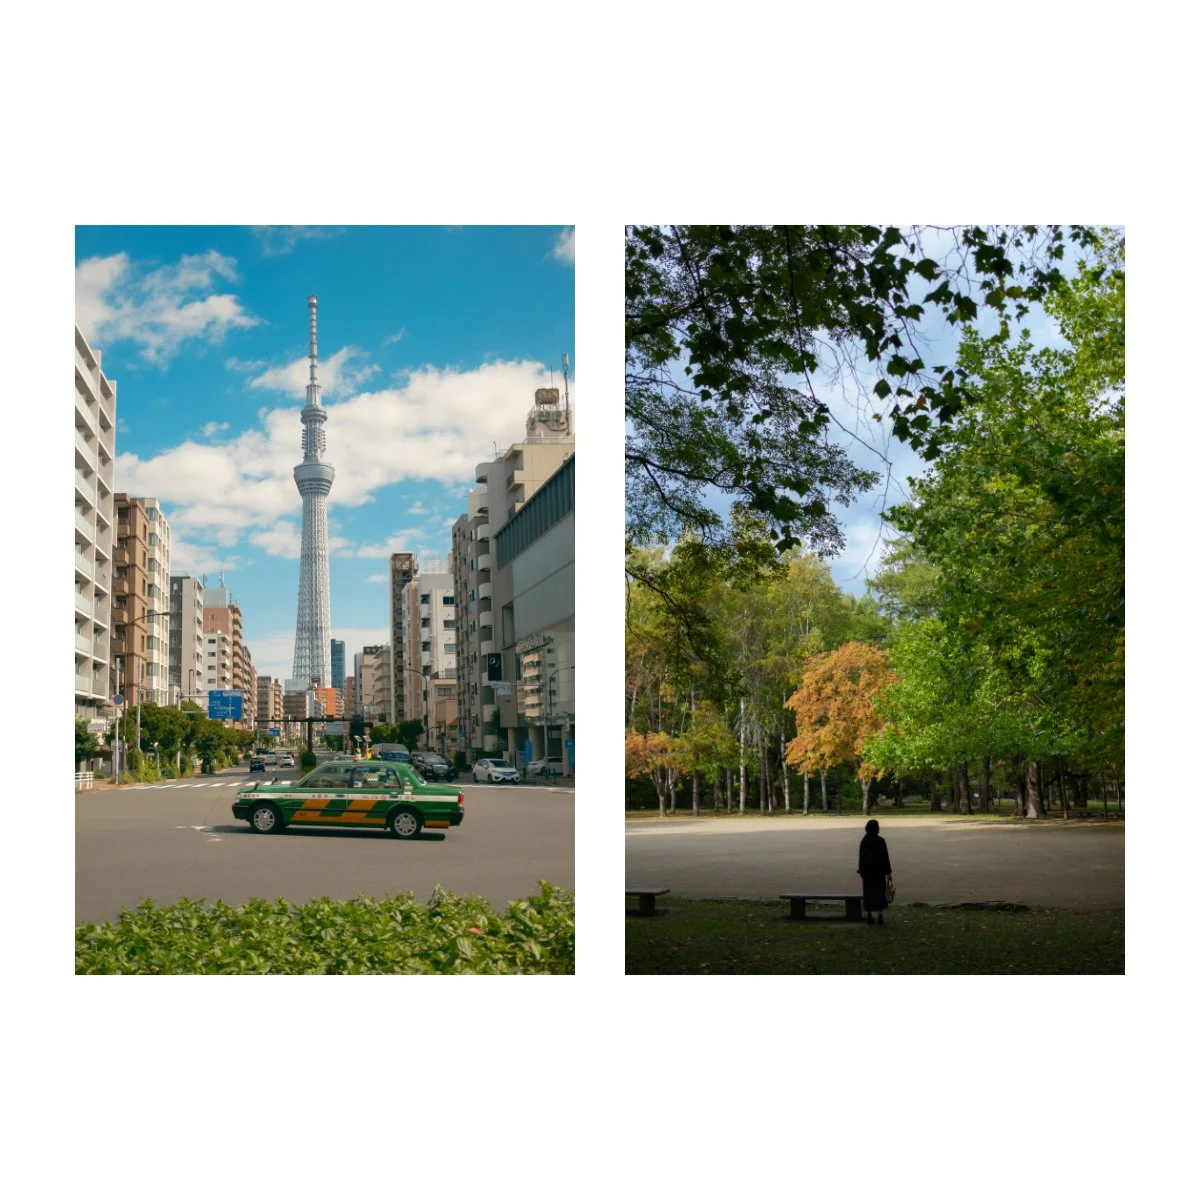
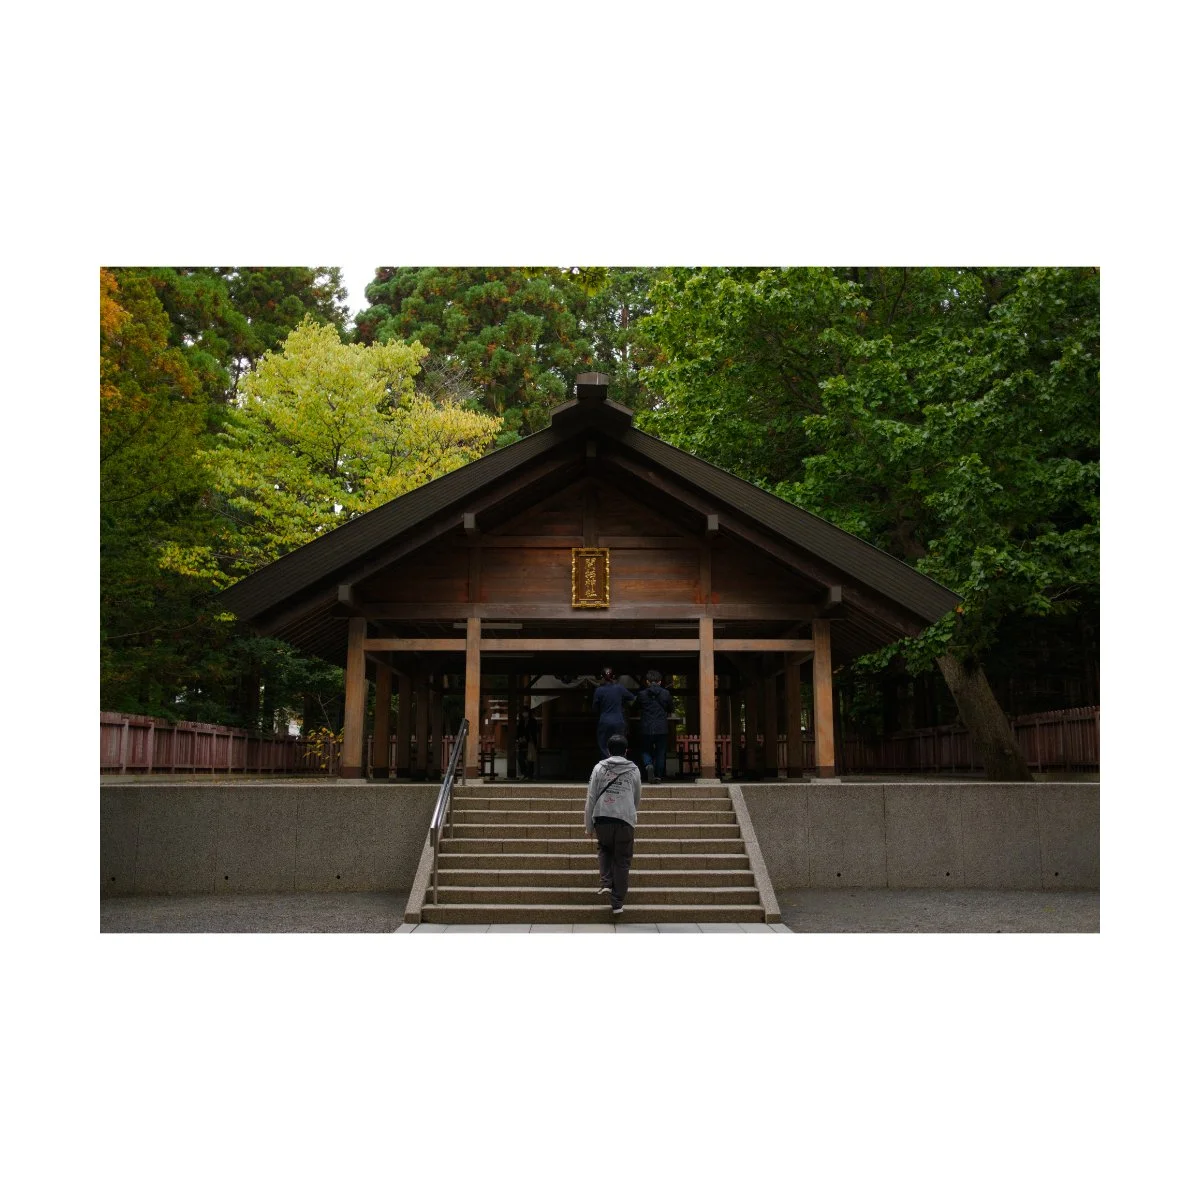
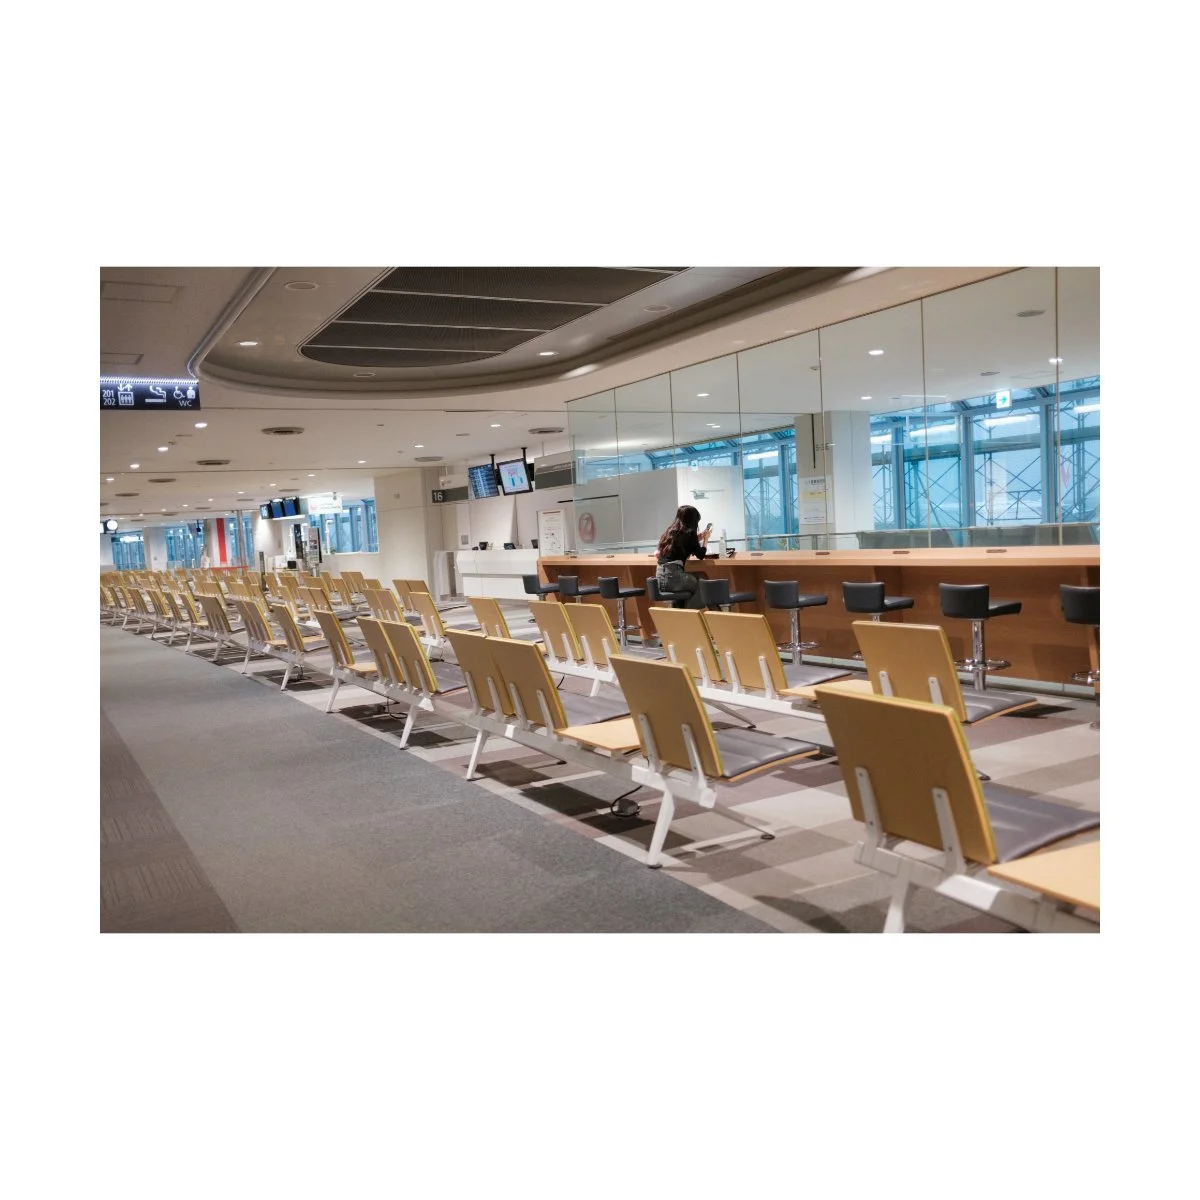
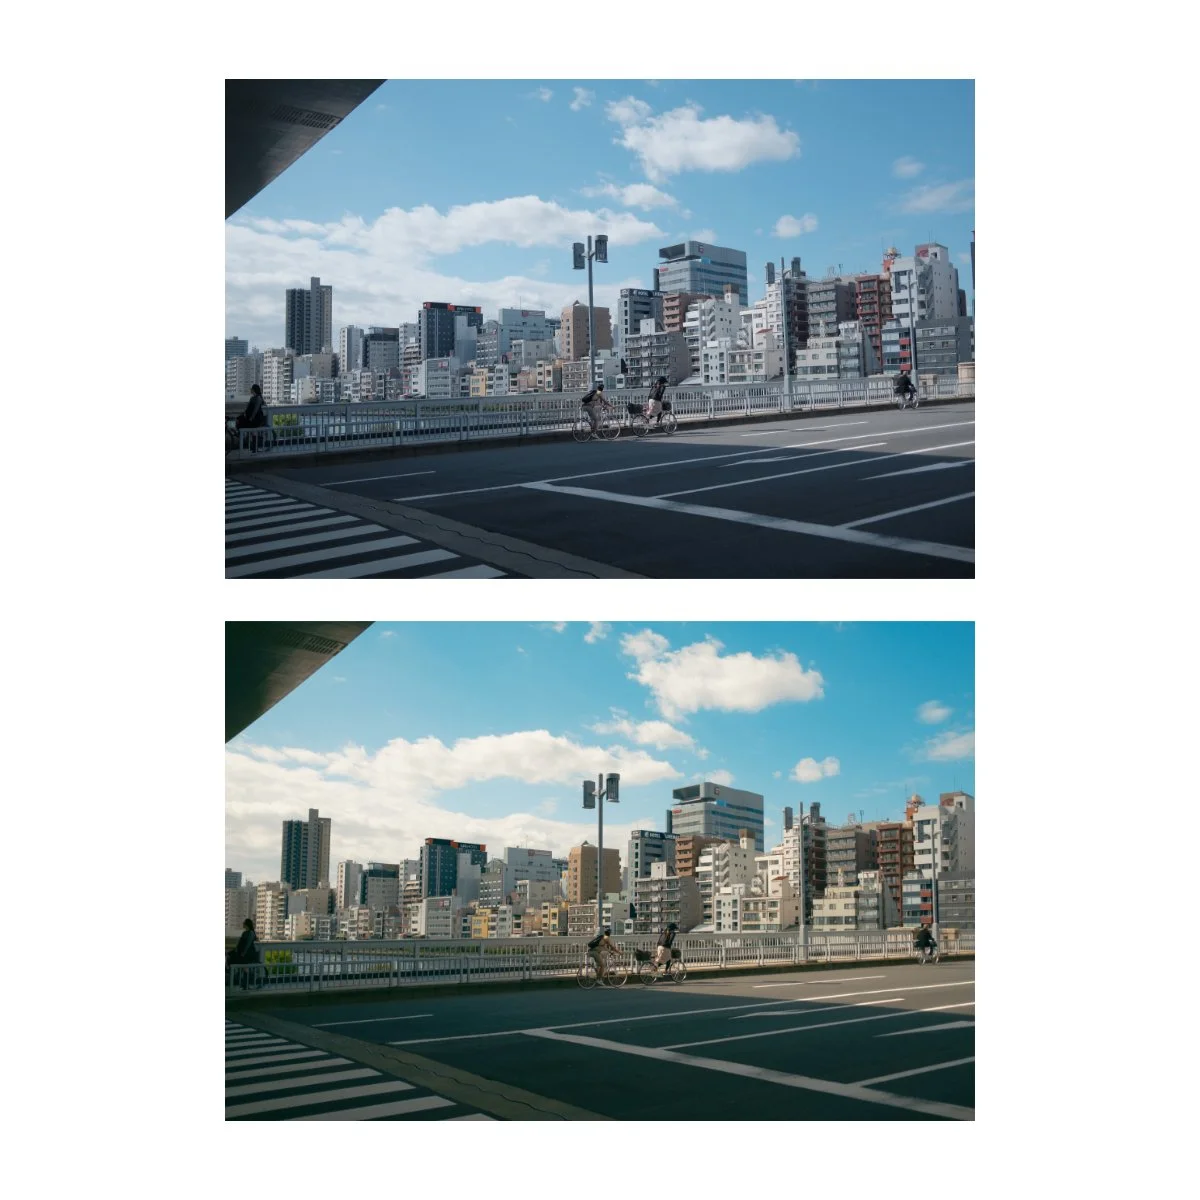
Travel Photography
Travel photography can mean a lot of different things to different people.
For some it means walking around the city shopping and eating good food.
It could mean integrating with the culture, getting involved, and seeing how people live their lives.
Or it could mean hiking to some rural area for a view that exists only there.
Depending on how you travel, your travel photography might lean more to documentary and street photography or nature and landscape photography.
In these instances, the x100vi will obviously be better at the street and documentary side.
For reasons we mentioned earlier, using the camera for landscapes will be challenging unless you’re documenting the trip itself or you just get lucky.

But when it comes to getting close up, getting involved with the culture, capturing daily life in a different country, the VI excels.
I’ve taken both the VI and the V to many different countries and would have suffered greatly if I didn’t have them.
Bars, restaurants, busy streets, tall buildings, etc, are all perfect places for the 35mm eq.
Plus the camera is easy to bring around and looks casual enough to blend in.
Most people will just think you’re a tourist and won’t look twice.
So it’s a great option if you like to travel and really enjoy the country you’re in, but not necessarily care to do a backpacking trip to the Dolomites.

For example, a few years ago when I was in Europe, most of our trip was spent enjoying the city life.
We didn’t go around to too many viewpoints, hikes, or scenic destinations.
For that type of travel photography, the V did really well, as that trip leaned more heavily on the street photography side.
And I could capture not only the things we did but the people we met on our journey.

Even just last year when I was in Japan and did visit a lot of scenic spots, the VI was my main driver.
Because whether or not you realize it, a lot of travel is the normal stuff.
Waiting around at the airport, checking into hotels, walking back and forth trying to find something to eat.
There’s a lot more to travel than just the destination.
And lugging around the X-T4 with the 18-55 every single day would have been a pain the ass.
Instead, slinging the VI around my waist meant that I could do other things like hunt for food and shop while taking pictures along the way.
It a perfect option for those wanting to do normal stuff but can’t resist taking a photo when they see something photographable.
Cameras like the x100vi suit that side of travel, while bigger bodies and lenses you can save for the bigger adventures.
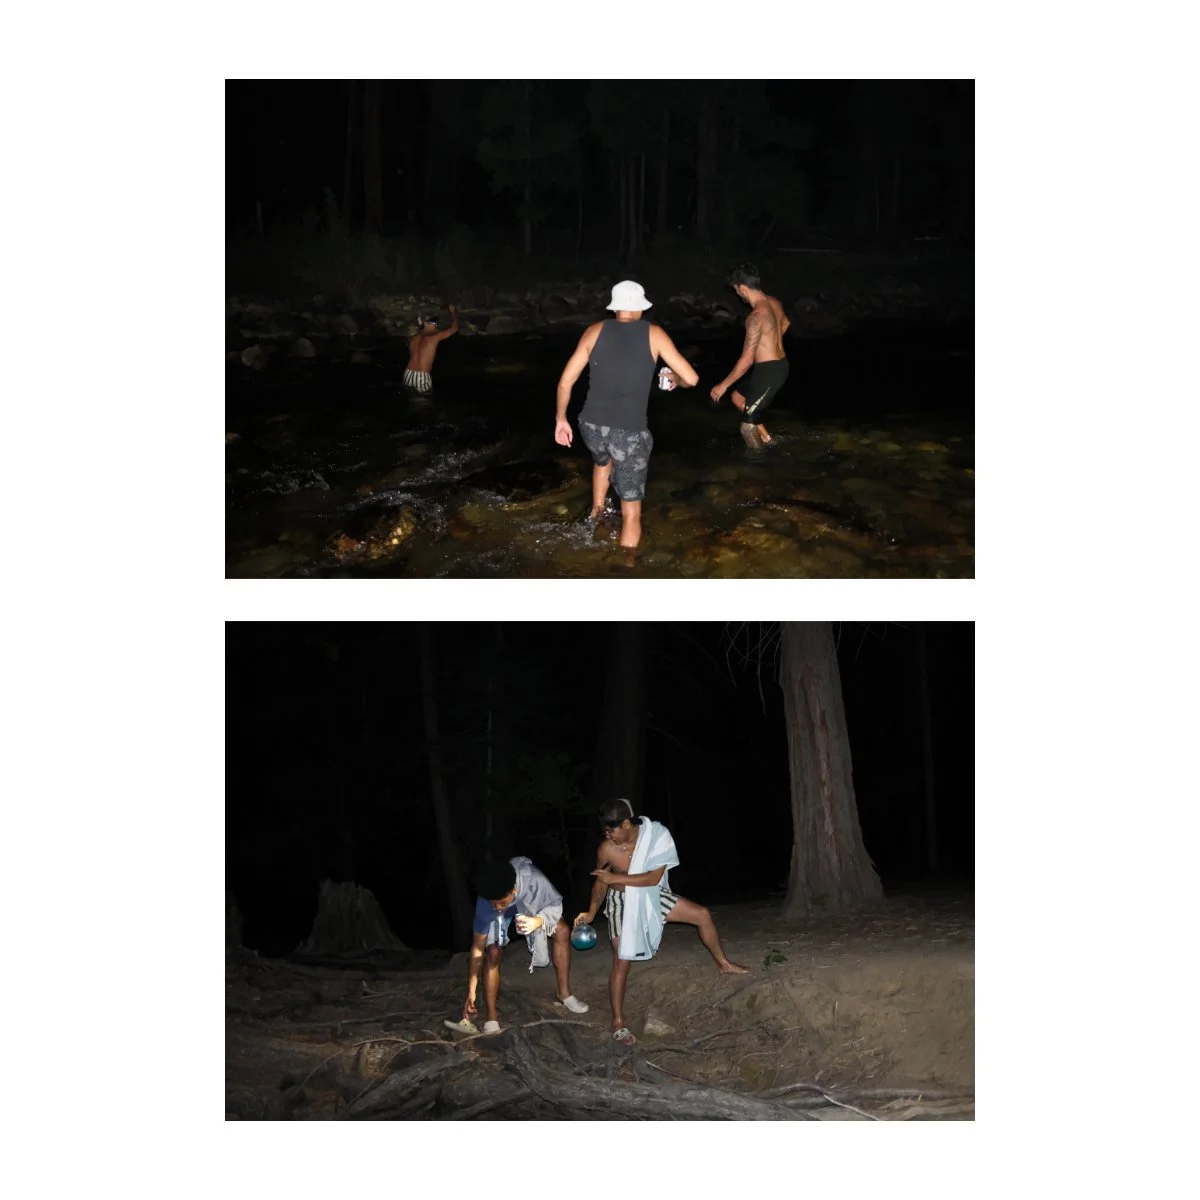
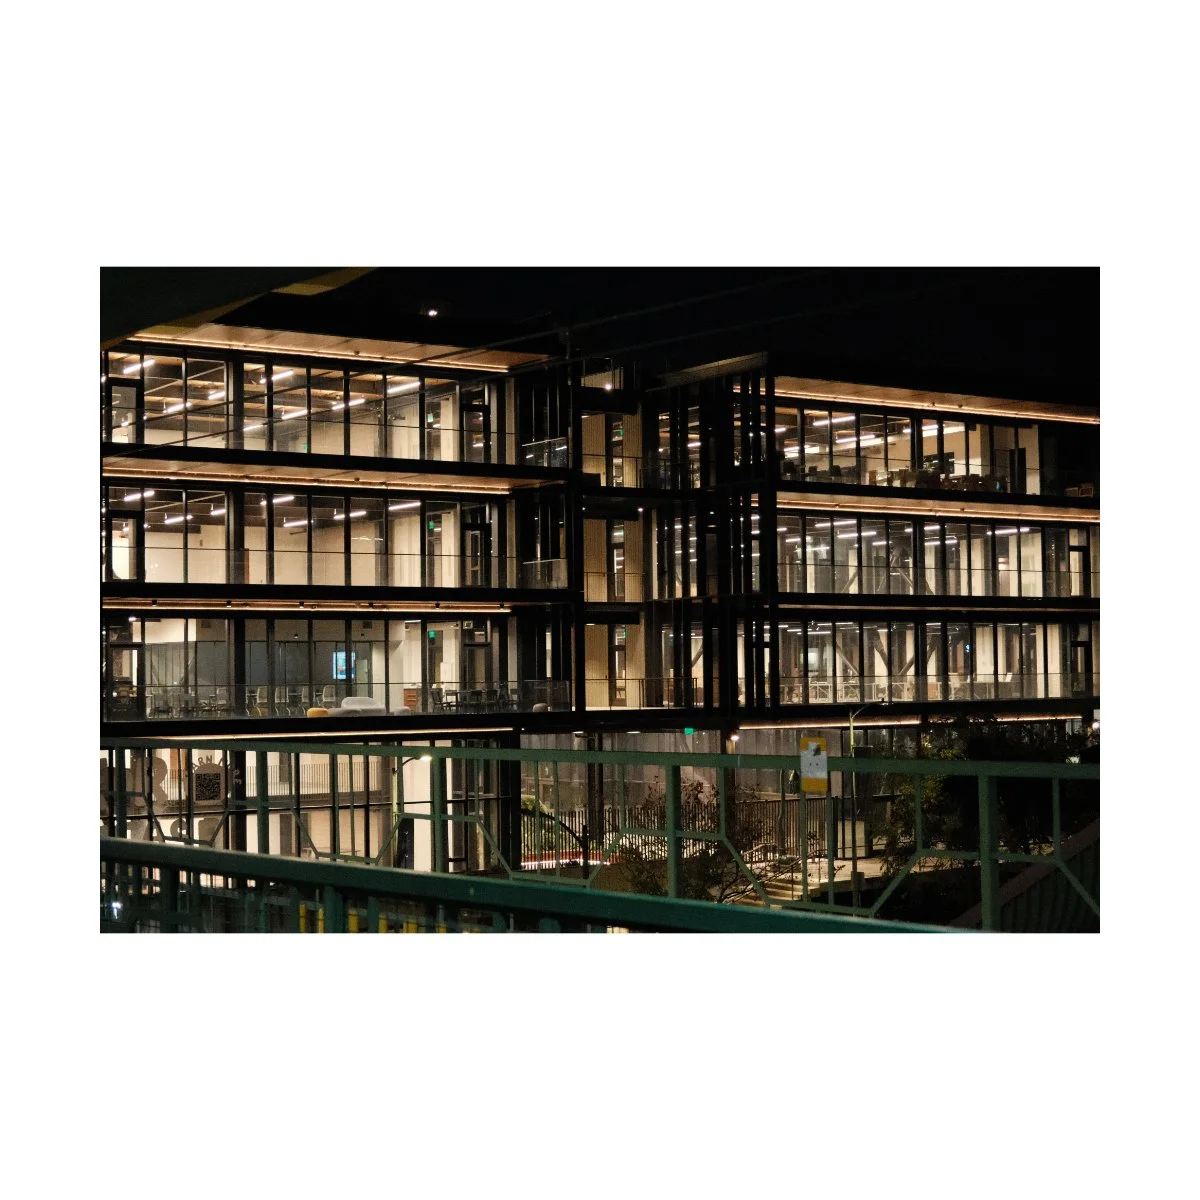
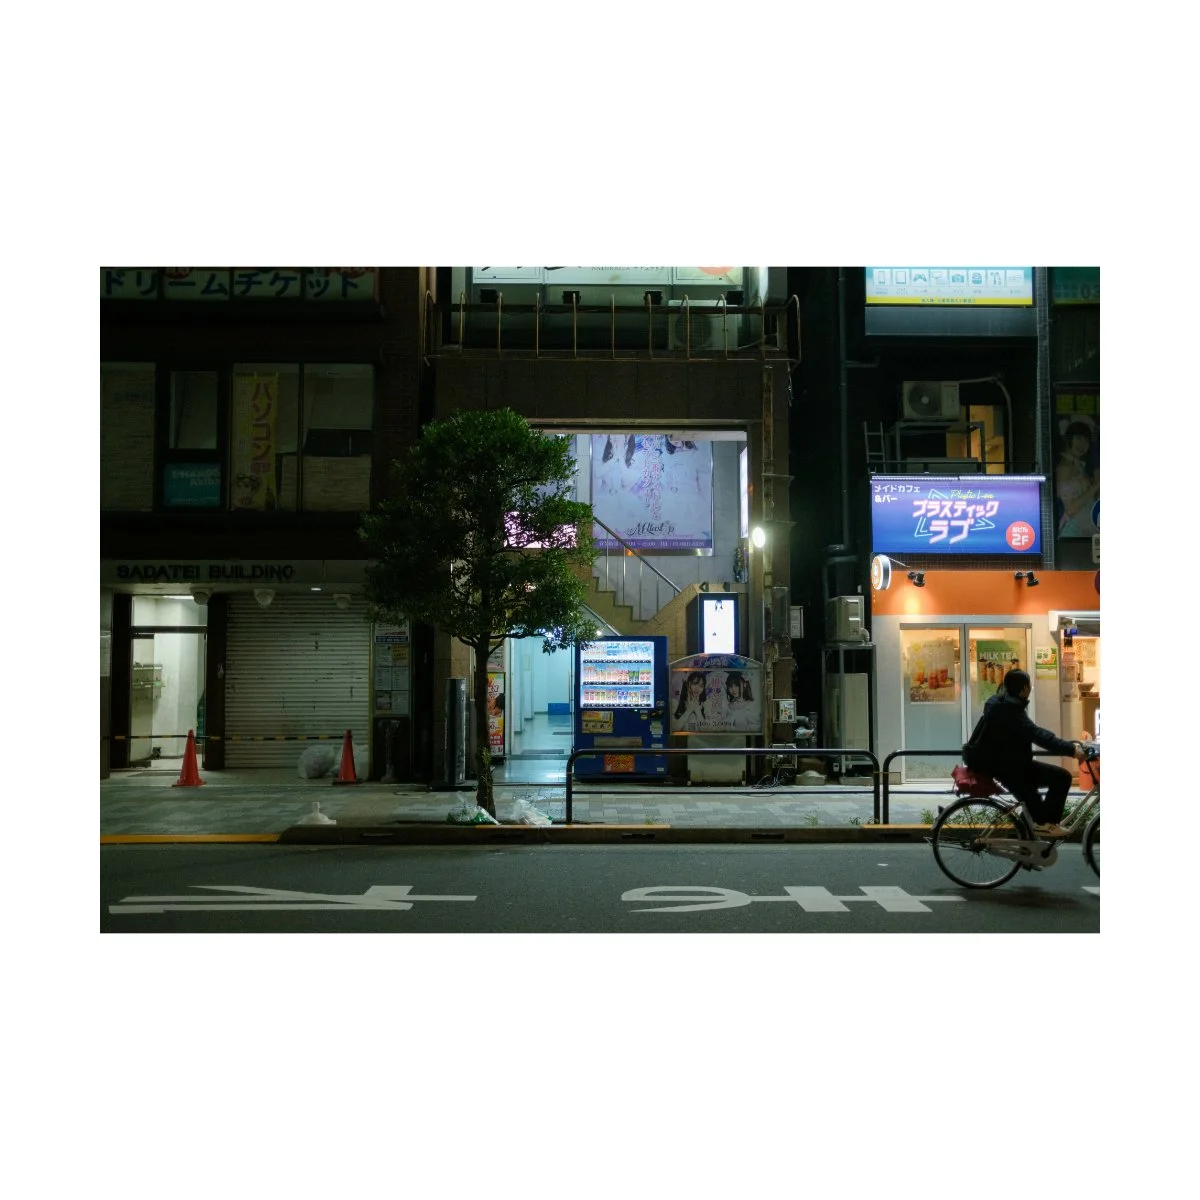
Nighttime Photography
The x100vi is a solid low light night time photography camera.
It’s got an f2 lens, a built in flash, high ISO range, and even IBIS to balance exposure out.
Personally, I’ve had mixed results with IBIS so I tend not to use it for low light photography.
Rather I’ve learned that simply seeking out light sources can make a big difference with how your low light photos appear.
Aka, if you’re taking photos of something completely dark or without light, you’re gonna have problems no matter how good your camera is.
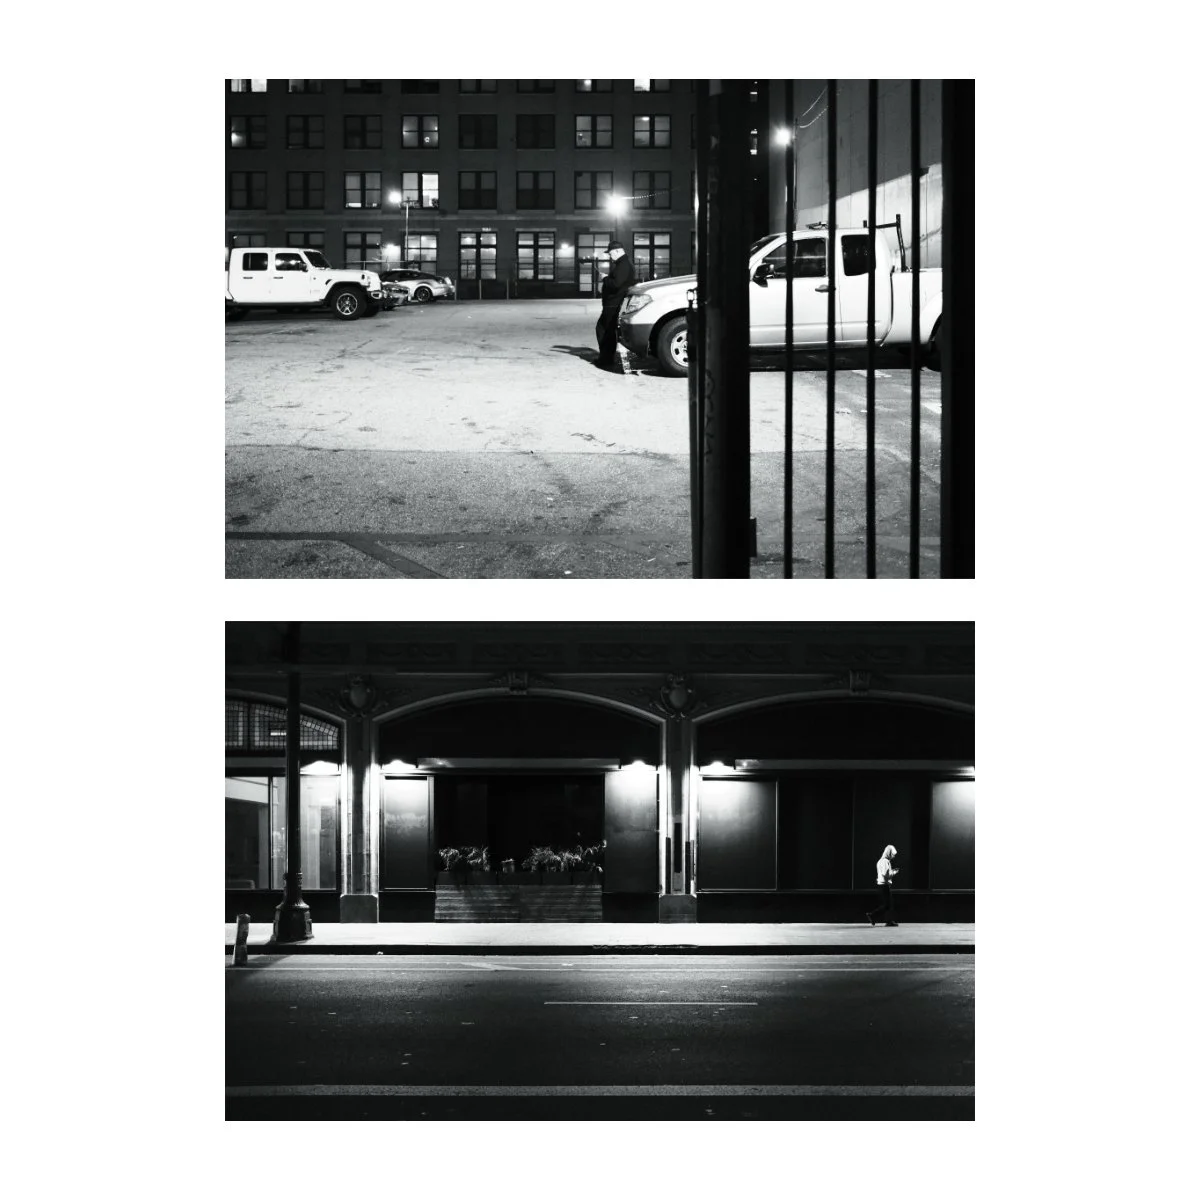
But if you simply take your time seeking out a source of light, the f2 aperture along with an appropriate ISO will get you good results even without flash or IBIS.
I personally max out my ISO at 6400.
This was a habit I brought over from the V since using an ISO higher than that would usually be too noisy.
I’m sure the VI could run a higher ISO with no problems, but I haven’t tested or really needed that, so I stick to 6400 for good measure.
Now the built-in flash, although not always necessary or preferred, is very useful for low light photography.
You don’t always want to send flashes off because you’ll blind people, but sometimes you don’t have a choice.
In completely dark situations where there aren’t any light sources, the VI can actually grab focus and expose with a flash.
This can be a hit or miss and I’d say it works 50% of the time, but it’s very clutch when it does.

For example, some of these shots I took when camping, we were down by the river and it was completely dark.
The VI missed focus occasionally, but for the most part was able to focus and fire.
So personally, I only use flash in lowlight situations like that where I have to and I’m around people I know.
It’s just too obvious and blinding for something like street photography.
Daytime Photography
Along with the flash, another aspect of the VI that makes it a complete camera is the built in ND filter.
I've talked about how great this is, but it makes taking photos and videos during the day so much easier.
Sometimes, exposing on a bright sunny day means you have to stop down and raise the aperture.
It works, but it’s non preferred, especially if you like the look from shooting wide open.

With the VI I tend to always keep the lens wide open, and will use the ND filter to darken the image.
All it takes is a quick button press, raising the ISO if it’s too dark, and I’m on my way.
Although you could technically buy an ND filter and place in front the lens, having it built in for both photo and video makes it so much more convenient.

Rainy Photography
You probably already know, but the VI and V are both weather sealed with a UV filter.
Some people don’t like putting UV filters in front of their lenses, but I think it’s a worthy trade-off.
I’ve taken this camera many times out in the rain and never have to worry about it because it’s weather sealed.
Now obviously, I don’t just let it get soaked - I try to keep it out of water if I can, especially since water on the UV filter can blur the image or make it harder to focus.
But for the most part, I don’t worry about whether it’s wet or not.
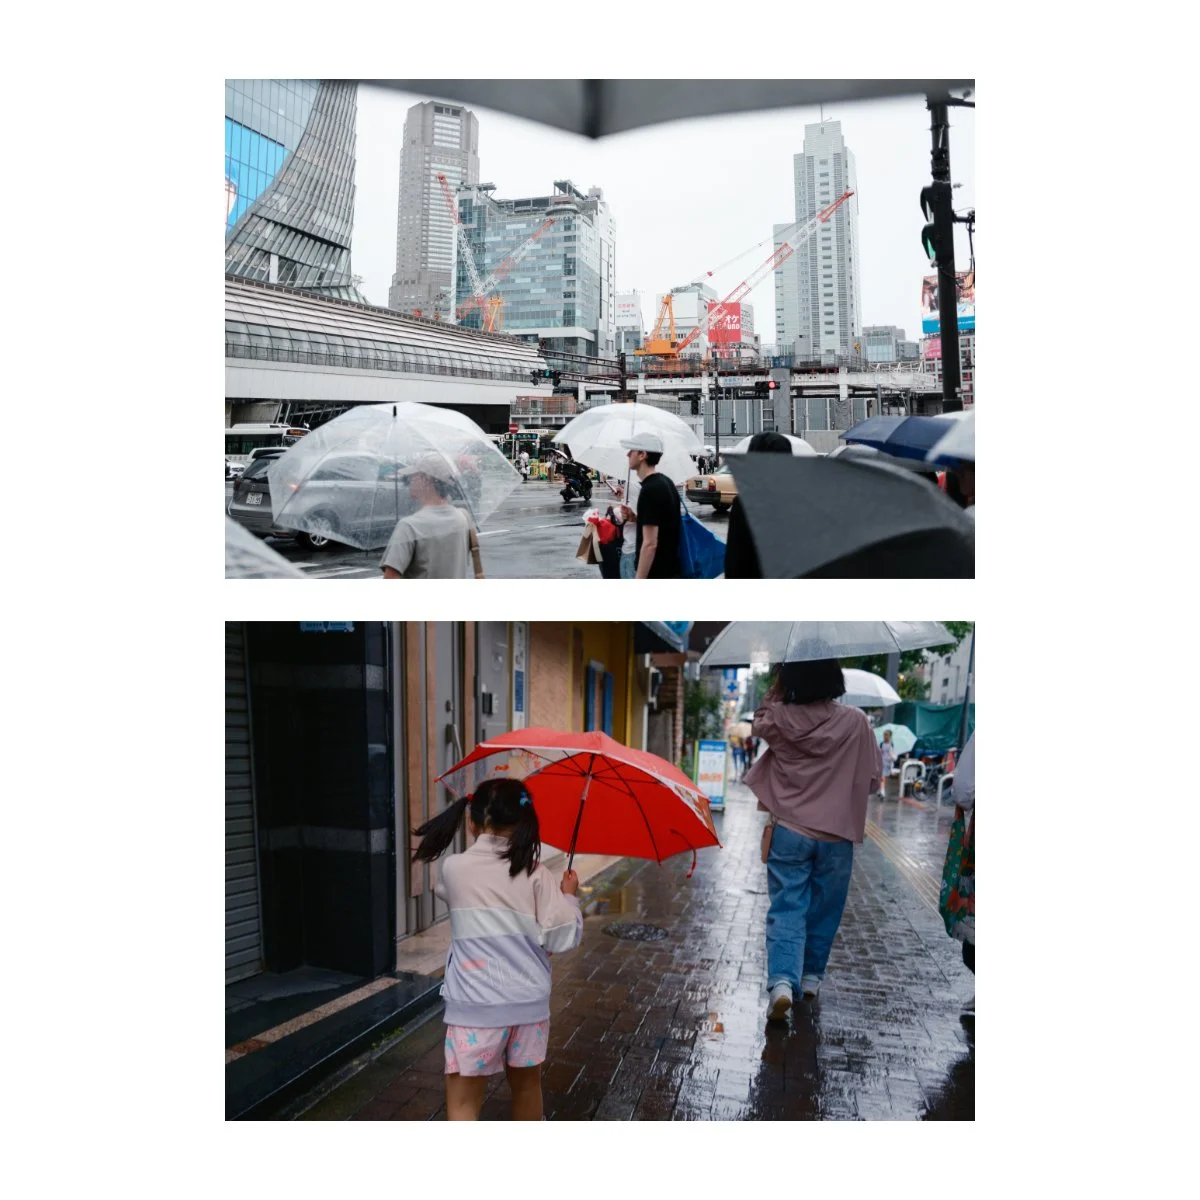
In combination with the low light capabilities, the daytime capabilities (ND filter), and weather sealing, you really can bring this camera out anywhere.
You’re not limited by the lighting or the elements and that’s pretty cool.

Digital Zoom
The final real world photography thing I want to talk about is the digital zoom.
The x100vi, although it has a fixed lens, also has a digital zoom feature.
Meaning you can rotate the manual focus on this camera and zoom in to a 50mm eq or a 70mm eq.
In past versions I used to think of it as a gimmick: just a feature Fujifilm added to please the people who complained about the fixed focal length.
Because it’s a digital zoom, it’s basically no more effective than cropping in to your photo.
The compression won’t be the same as taking a photo with a tighter lens and there will be a reduction in image quality.
So past me said, “Whatever, I’ll just stick to the normal focal length.”

But lately, I’ve been testing this feature out and I’ve been quite impressed.
I’ll share with you deeper details in another article, but I think the digital zoom on the VI has a lot of potential.
This is primarily because of the increase to 40MP, making the reduction in image quality less and less noticeable.
It still won’t be the same as taking a photo with a real 70mm lens, but that’s okay, that’s not the point.
So my results are still pending, but if they’re good, it opens this camera up to a lot of possibilities.
Settings w/the x100vi
Depending on the photography you do and the photographer you are, your settings will vary.
And I’ve said before that you shouldn’t copy another photographer’s settings, only seek to understand them - because using their settings won’t always get you the same results.
Rather a foundational understanding of what each setting does and why it was used will lead to better results in the long run.
That being said, I have customized my VI in a way that’s convenient for me to use - today, I’ll share that with you.
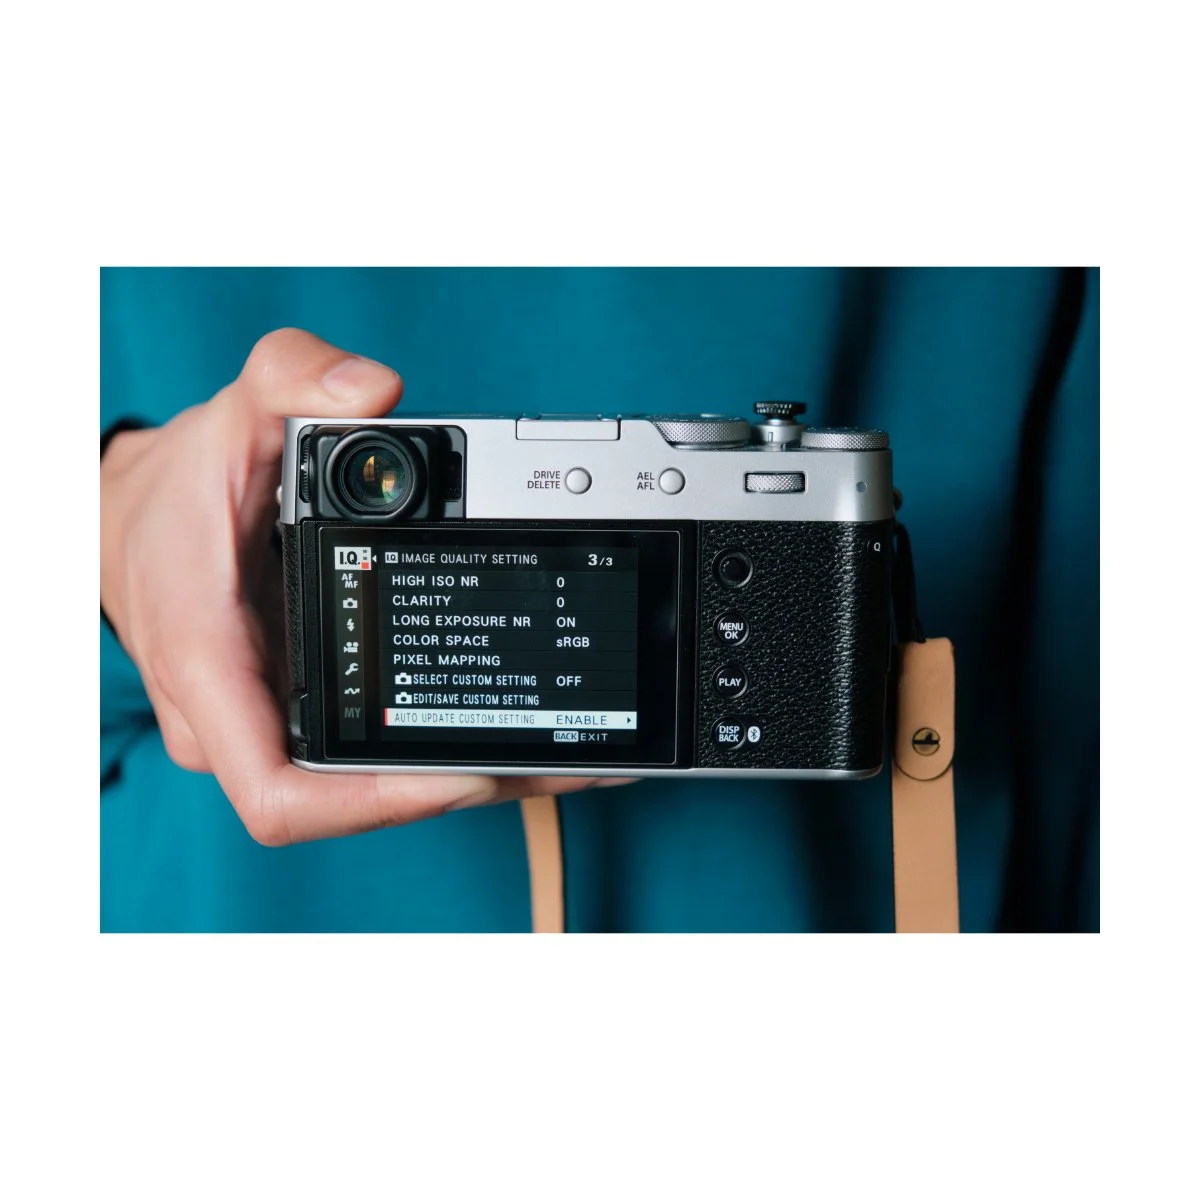
Custom Buttons
When it comes to custom buttons, I like to keep things simple.
There’s a lot of room for customization and there’s a ton of different adjustments you can make in camera.
I find that trying to manage all of that makes photography complicated.
So I opt to weed out the fluff and simply focus on the few things that matter.
Aperture, ISO, and Shutter Speed all have their own dials - so I don’t have to worry about those.

The only other settings I change are things like the ND filter and selecting a custom film simulation.
The ND Filter toggle I have custom set to this top right button here - it makes it easy to turn on and off if I need it.
I also have “Auto Update Custom Setting” Enabled, so if I switch between custom film simulations, my ND filter toggle is saved and I don’t have to press it again.
It can be annoying if you’re tweaking other settings at the same time because your camera will auto save, but that’s okay.
By the way, to customize your button layout, just hold the display/back button to open that menu up.
To switch between my custom film simulations I press the front button.
This is the same button as the dial that allows you to switch between viewfinders.
The button itself is a little harder to press than the button I use for the ND filter, so I use it for film simulations since I don’t switch simulations as often.
Now, the touchscreen of this camera does have swipe functionality.
Swiping up, down, left, and right can trigger a setting change in the same way that pressing a button would.
I used this for a while but stopped because it didn’t work well.
Often I’d have to swipe multiple times to do it right, since the touchscreen isn’t that responsive.
It would occasionally even think I’m pressing a focus point and take a picture instead.
This could work better if I took the screen protector off, but it’s fine.
I don’t bother with the swipe functions and I don’t feel limited without them.
Fujifilm cameras also have a Q Menu button on the side, allowing you to customize an entire quick menu.
With this menu you can add a bunch of different settings for quick access.
I personally left my menu to 8 settings, and might even be better off with 4.
Too many settings makes it cluttered, hard to change, and I don’t even use that much to begin with.
The main ones I use are toggling the flash and the Self-Timer.
That’s pretty much it.
Essential Settings for Everyday Shooting
When it comes to settings for everyday shooting, this part can be a bit tricky.
I’ve made several articles on how to learn and understand camera settings, so you can check those out.
We also cover a lot of it in Photography Essentials - it’s free.
But in essence, with this camera, these are my preferred settings.
Typically I like to shoot wide open, staying at f2 the whole time.
F2 gives me some separation when I’m close up and I like the general look of it.
If I find myself at a viewpoint, I might go to f8 just to make sure everything’s in focus.

But with this focal length, landscapes tend to be a bit flat anyways, so if I’m taking pictures “out there” most things will be in focus.
Shutter speed I like to keep at 1/500, 1/250 if I need the light.
I find that 1/500 is enough to capture most stills without getting weird motion in my images.
Anything slower can get tiny blurs for the way I shoot.
If I’m shooting in daylight, I’ll usually toggle the ND filter on so I can stay wide open at f2.
If I’m shooting at nighttime, I’ll usually bump the ISO to 6400 before considering dropping Shutter Speed below 1/250.
Again, this is stuff you have to play around with.
For flash, I typically use standard TTL settings and turn it on if it’s too dark, matches the look I want to get, and I’m around people who are comfortable with it.
I don’t use grids, histograms, or levelers when I shoot.
I find that those take up space on the screen and interfere with what I’m seeing.
I’ve also learned to orient and level my frame based on the outside world.
We cover this in the “Perspective” Chapter of Photography Essentials, but understanding how to orient and line things up without tools is a skill.
The better you get at it, the easier it’ll be to get the right shots at the right angles with just a quick snap.

So that’s how I customize and use my x100vi.
It’s pretty basic and simple and I prefer it that way.
If you want to custom tailor your camera to your preferences I’ve got one tip:
Delete the stuff you don’t need.
If you find certain settings, buttons, and functions in your menus that you don’t use, remove them.
A lot of stuff isn’t as necessary as we think, and it’s worth removing them from our sight to optimize for a more streamlined shooting experience, with the settings and functions we actually use.
Plus, these occasional settings can still be found in the menus for the rare moment you do need it.
Try it out, it’ll make your photography much simpler.
Customization w/the VI
When it comes to customization with the VI, you can do all sorts of crazy stuff.
You can buy all the grips, the straps, and even skins if you want.
Me, I like to keep mine simple.
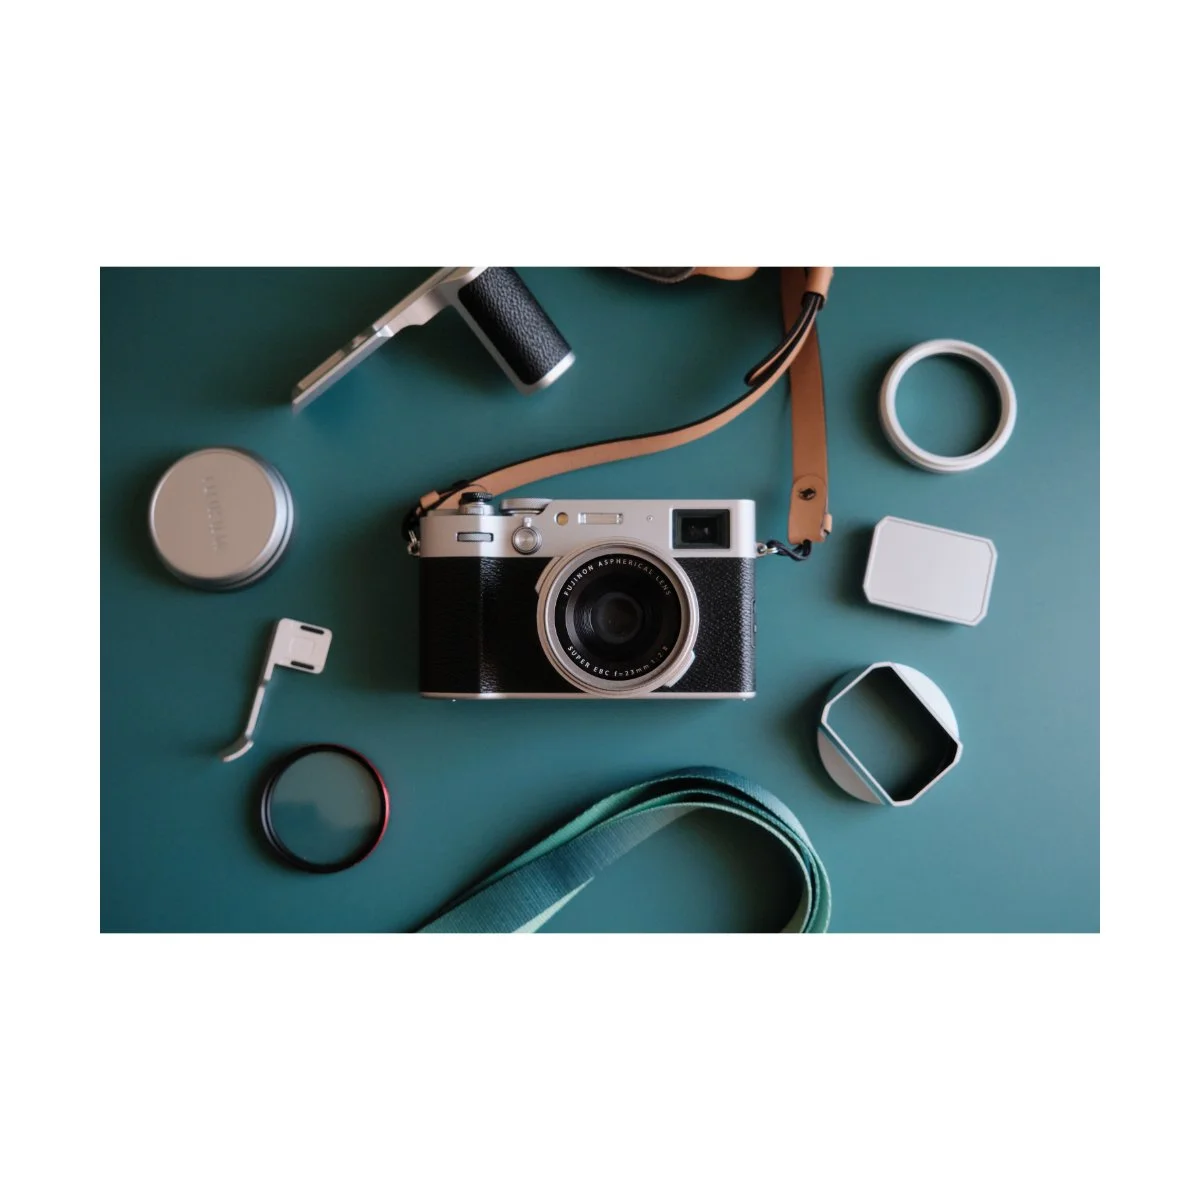
I’ve covered all of my x100vi accessories in-depth in a different article, but here’s the short run of my current setup.
Right now, I always have a UV filter with an adapter on.
That makes it weather sealed and it’s not too bulky to take on and off.
Plus, if you get a quality one like this B&H one, you don’t have too worry about image quality loss.
I also have a Cinebloom 10% filter that I’ll use occasionally.
This is just your typical mist filter, which accentuates halation from light sources.
I’m honestly not a big fan of the red on silver - I think it looks better on the black x100s, but whatever.
As for other filters, I’m considering experimenting more with starburst and light filters, just to see how they look.
I’ve tried them on other lenses and I think it’s a nice effect.
I tend to use generic cheap soft shutter releases as they’re easily replacable.
Many soft shutters tend to come off and get lost easily.
The hot shoe cover I have is a stock one.
I am considering investing in a nicer looking soft shutter release and hot shoe cover, but this is what we have for now.
My new x100vi hotshoe cover.
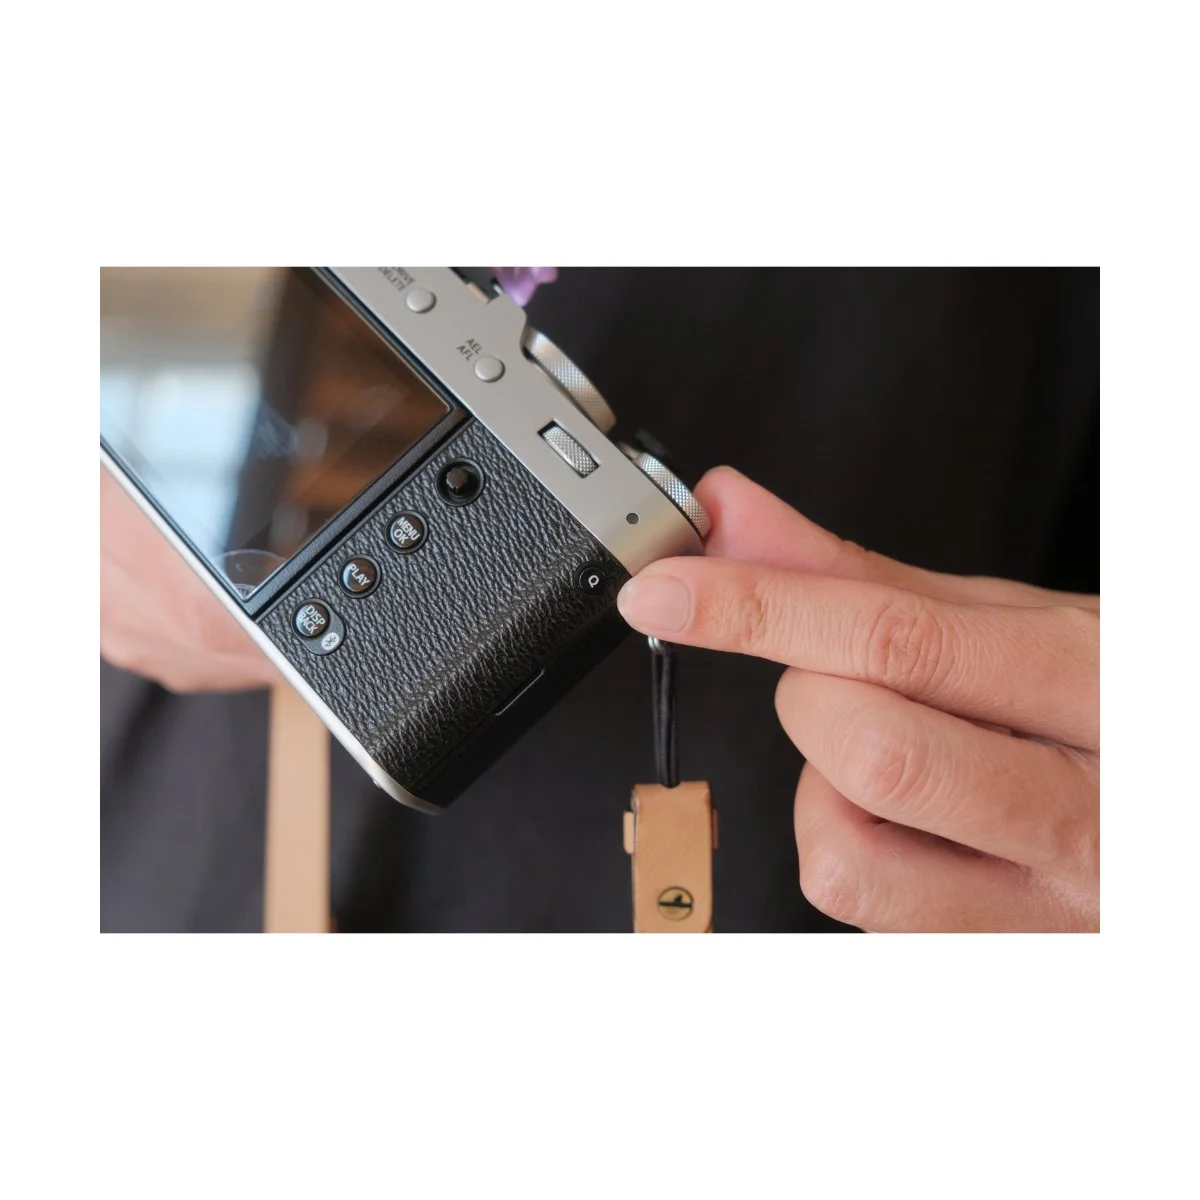
The camera strap I use is Moment’s leather camera strap.
I’ve been using this one for years and it’s served me well.
It’s a bit pricey so I recommend waiting for a sale.
I also don’t have any WCL or TCL lenses.
I’ve considered getting one and trying it many times in the past, as I’ve heard good things about them.
But honestly, the 35mm eq focal length is perfect for me.
Plus, I have no interest in adding bulk to the front - I like my VI the way it is.
So, that’s my current x100vi setup - people ask me these questions all the time so hopefully that cleared some things up.
Workflow w/the VI
Workflow with any Fujifilm camera is highly personal.
Some people use the standard JPEG + RAW setup, others shoot only JPEG.
There are benefits to either, and I’ve experimented with all of them, so I’ll share with you what I think.
JPEG Only
JPEG only shooting leaves the smallest footprint.
File sizes are small, you don’t have to worry about editing, and you’re committed to style right then and there.
SOOC JPEGs with Fujifilm are very good and if learned to used right can mean great images with no editing.
JPEGs are often easier to share, easier to post, and easier to store.
It also requires commitment: committing to a film simulation and it’s adjustments can add some finality to your photography, making you less lazy.

This can make taking photos feel like film since the look you have is the look you get - no room for adjustments and no room for mistakes.
I find that JPEG only workflows are great for people who like to shoot film, hate editing, or prefer a mobile workflow.
It also serves as a great tool to improve your photography, providing a constraint to make things more intentional.
You can obviously still edit your JPEGs, but if you’re going through that much trouble you might as well shoot RAW.

RAW Only
RAW only Fuji photographers I think are the rarest of the three.
If you’re going to shoot RAW only it means you don’t care about the JPEGs and only want to edit for a final product.
I went through a small phase in time when I did this.
I felt as if the JPEGs were useless because I was just going to edit my photos anyways, and they only took up space on my hard drive.
Furthermore you can still use Film Simulations in programs like Lightroom and Capture One.
They don’t look exactly like the SOOC ones, but you can always use Fujifilm’s RAW X Studio conversion for that.
It was a little slow though, so that’s why I stopped using it, but that was my logic at the time.
Shoot RAW only, edit the photos, convert if you want the JPEG look.
It’s a workflow suitable for photographers who don’t want the hassle of having thousands of JPEGs they’re not going to use.

RAW + JPEG
The final workflow we’ll talk about is RAW + JPEG.
I think most photographers use this workflow because it gives you the best of both worlds.
You have your JPEGs for SOOC adjustments and settings.
And you have your RAWs just in case you want to edit your photos, or need a backup.
Often times JPEGs, while cool and convenient, are not the most optimal for archiving.
This is because JPEGs are lossy, meaning if you toss them around enough, they’ll lose quality.
This can be a problem, especially if you’re like me and want to print your photos and make photobooks.
I always prefer to have a RAW file, so I can make multiple exports, moves files around a ton, and just have a safe original file to back up.

JPEG only and RAW only workflows, while they have their benefits, also have their downsides.
For me, the JPEG only workflow is a problem, since it doesn’t have that high quality backups like we just mentioned.
RAW only workflows are also inconvenient, since most Windows Explorers can’t preview RAW files and it’s difficult to share photos with friends.
So although I used to think the JPEGs were useless, I realized I needed them to quickly preview and scroll through my photos.
I also send the SOOC JPEGs to friends and family if I just came back from a trip.
Photo editing takes time, so I leave the RAWs just for me.

The RAW + JPEG workflow has one major downside, and that’s storage.
Because you’re shooting in both, you have two copies of every photo.
That expanded for thousands and thousands of photos really does add up.
In my opinion, it’s worth the trade-off, although which workflow you prefer, you’ll have to decide for yourself.

Final Tips for Your Fujifilm Workflow
As I mentioned earlier, I use a combination of JPEG and RAWs to process my images.
JPEGs allow me to experiment with different looks, recipes, and adjustments.
Now, a lot of people look at film simulation recipes as some magic filter to make all your photos look like film, but I’d recommend to be careful.
My tip for you is to start with just the film simulation and avoid recipes in the beginning.

Many recipes have a lot of white balance and color cast adjustments so they’re not suited for all purpose use.
Rather certain frames, lighting conditions, and scenes don’t always look good in recipes.
So you might find yourself shooting with a recipe expecting a certain result and realizing that only a few of your shots look good.
It’s still a fun way to take photos and experiment, I’d just exercise some caution.

Standard film simulations on the other hand, work pretty well, and it’s hard to go wrong.
Most of the film simulations like Classic Chrome, Classic Negative, and Reala Ace can be used at all times of day.
From bright and sunny to dark and lowlight, you’ll get a pretty good result regardless.
Custom recipes on the other hand can bleach the image in such a way where it doesn’t always look good.

And I’ve had many instances where some images were done dirty, even with recent popular recipes like Cuban Negative.
Think of custom recipes like presets - they’re a hit or miss, and some will require adjustments to look good.
The way to understand what adjustments are necessary requires some level of understanding of the film simulation and photography as a whole first.
Now if you have a RAW + JPEG workflow, there’s more flexibility.
There is always room to edit your photos in post if you don’t like the JPEG or you can convert it again for a different recipe.
RAWs typically remain in their “base state”, unedited or unfiltered by any custom recipe.
I have had problems in the past where certain recipes would bleach the RAW itself, and I’d have to readjust the white balance to get it back to normal - but it’s not common.
While editing RAWs you can choose to edit purely from the RAW or use Film Simulations like a preset.
This is what I tend to do, although I have edited many RAWs from their base state and have gotten good results.
The point is you don’t have to use Film Simulations if you don’t want to or don’t like the look.
Now keep in mind that using Film Simulations in either Capture One or Lightroom will not be exactly like a SOOC JPEG.
Fujifilm cameras process JPEGs in a unique way and I’ve often tried to match the results together unsuccessfully.
If you want the same kind of processing you need to use Fujifilm’s X RAW Studio.
This doesn’t mean that Lightroom and Capture One’s processing are bad - just not the same.
I’ve edited many RAWs in both programs and have gotten great results - although they won’t look the same as the SOOC ones.
Your best bet is to play around with both and see which suits you.
Me personally, I tend to be a little control heavy.
I can’t help but want a photo to look like it’s “ideal state” and therefore can’t leave the post processing to the camera.
Even if I think it looks decent, there have been many times where I’ve added adjustments to the JPEG itself and made it look “better”.
So for me, I’ve learned that editing my photos is something I have to do for peace of mind.
Maybe this will change later, I don’t know, but I’d be damned if I left a good photo not looking like the best version of itself.
This also doesn’t mean that all my edits are good - quite the contrary.
I’m still learning day in and day out and many of my edits miss the mark - so I fix them later.
But that’s the benefit of both photo-editing and shooting SOOC.
You can use either format to learn and understand color, tones, white balance, etc.
This works for both editing later and shooting SOOC (which I like to think of as editing real time).
Learning how to make adjustments and think about what a photo needs to be better will level you up.
Now if you want a deeper dive into Film Simulations specifically, I’ve made plenty of videos on that - check them out.
But anyways, that’s my current process and workflow.
And that’s just about everything you need to know about the Fujifilm x100vi.
If you made it to the end, you’re crazy - because I’m exhausted.

I hope this was helpful, share it with a friend if it was.
And if you want to learn more about improving your photography, shoot more and stress less, check out Photography Systems.
If you need something more basic and foundational, go to Photography Essentials first - it’s free.
Thanks for reading, I’ll see you next time.
Happy shooting.