How to Get So Good At Photo Editing You Question the Meaning of Presets
Once you reach a certain level of photo editing, presets become pointless.
Not because they’re not useful, but rather because you don’t need them to create the looks you want.
Plus, many presets are situational and don’t work for every image.
This is at least in the context of street and travel photography, because I do street and travel photography.
Now I’m not arguing for or against the use of presets, you can do whatever you want.
I myself edit off of film simulations, which are kind of the same thing.
But I don’t need them - that’s my point.
I’ve edited plenty of images in their pure raw color profile, no problem.
I simply use film simulations because I want to, not because I have to.
Just saying, before anyone jumps at me in the comment section.
My point is: presets have their uses but can also be a crutch.
And as photographers, we want to reach a level where we don’t need presets, but rather use them if they’re convenient.
In other words, let’s get so good at photo editing we question the meaning of presets.
We’ll start with some frameworks and finish off with an actionable tip.
A few of these I’m sharing from Photography Essentials - you can learn more in the link (it’s free).
Let’s dive into it.

Less is More
Less is more in everything, and photo editing is no exception.
The problem I often see many beginners have is they just do too much.
Lightroom and Capture One are powerful tools.
Modern cameras have a lot of dynamic range.
So it can be easy to tweak all sorts of settings and change everything.
People will add too much saturation here, too much grain here, too much clarity here.
And you have to be careful when playing with these sliders because it can easily get out of hand and ruin your image.
The worst part?
You might not even know it.
It could just normal to you because that’s what you’ve always done.
So if you’re ever sitting there thinking to yourself, “is this too much?”, it probably is.
Dial back the slider a bit and remember:
Less is more.
And just because you can move a certain slider, doesn’t mean you should.
Create Variants
Something that’s helped me a lot when photo editing is creating multiple variants.
This applies not only for the photos I take but also the looks I make.
Sometimes you just don’t know which photo looks better until you see them side by side.
So what I’ll do is: create a variant, re-edit the photo, and compare them to each other.
I did this for a few shots I took of Mt. Fuji in my recent trip to Japan and you can feel the difference.

This can also be useful if you just want to tweak a few settings and not the whole image.
Adding just a little contrast here, lowering the saturation here, bringing out the color here, and then comparing the two will help you judge which setting is necessary or unnecessary.
And then you can either delete the worse one or copy a few of the things you liked over.
To be clear, I do this for my 3 star or 5 star images, because it’d be too time consuming to do for every single photo.
I’d encourage this practice even if you already think, “This photo looks amazing”.
Because sometimes you just don’t know, you’re excited, and think “this looks great”.
But in these instances I’m reminded of a tip I heard from a colorist a long time ago:
“Everything looks good until you see something that looks better.”
Meaning you can’t just assume that this is the best looking version of your photo.
It might just be the best version you’ve seen.
However, if you re-edit the photo or apply a few tweaks you might realize there are other variants that look even better.
And you’ll learn a lot about photo editing that way.
So create multiple variants.
You might be surprised when you create better edits the second or third time around.

Learn to Desaturate
This is a concept I’ve just recently begun implementing into my photo editing.
In photography we always think: more saturation, more color, more this, more that.
But a powerful aspect that will make your edits better is to desaturate.
Sometimes your photos don’t need more color.
That’s the truth.
And sometimes adding more color will only make it more ugly.
So you need to resist the temptation of always adding saturation and vibrance to your images.
This also applies to single color saturation - resist it.
One thing you can do that will help you understand the importance of this is to globally desaturate.
Take an edit, lower the saturation and see visually how it affects your images.
Do this for multiple images, toggle the before and after, and you’ll notice how some images actually look better with less saturation.
And now you’ve unlocked a powerful tool.

The next unlock is realizing that color can create conflict within your images.
Sometimes it’s not that this photo need to be black and white.
It’s just: there’s a tad too much blue, green, or red in certain parts of the image - and they’re interfering with one another.
In these cases, you don’t need a global desaturation.
You need to find the color in conflict and remove that.
For example, in this photo I took of street art in Shibuya, I wanted to bring out the reds and blues of the image.

It only made sense since the primary colors of the art were predominantly red and blue.
But using the white balance and tint shift didn’t give me the right look.
It just tinted the whole thing and the reds and blues weren’t really popping.
Similarly, globally desaturating while adding more saturation to just red and blue didn’t look right either.
It was only till I gave it a closer look that I realized - there was green in the image.
And the green that would’ve been okay for another photo was interfering with the reds and blues of this photo.
So I shifted the red tone curve in my shadows, and I got the pop I wanted.

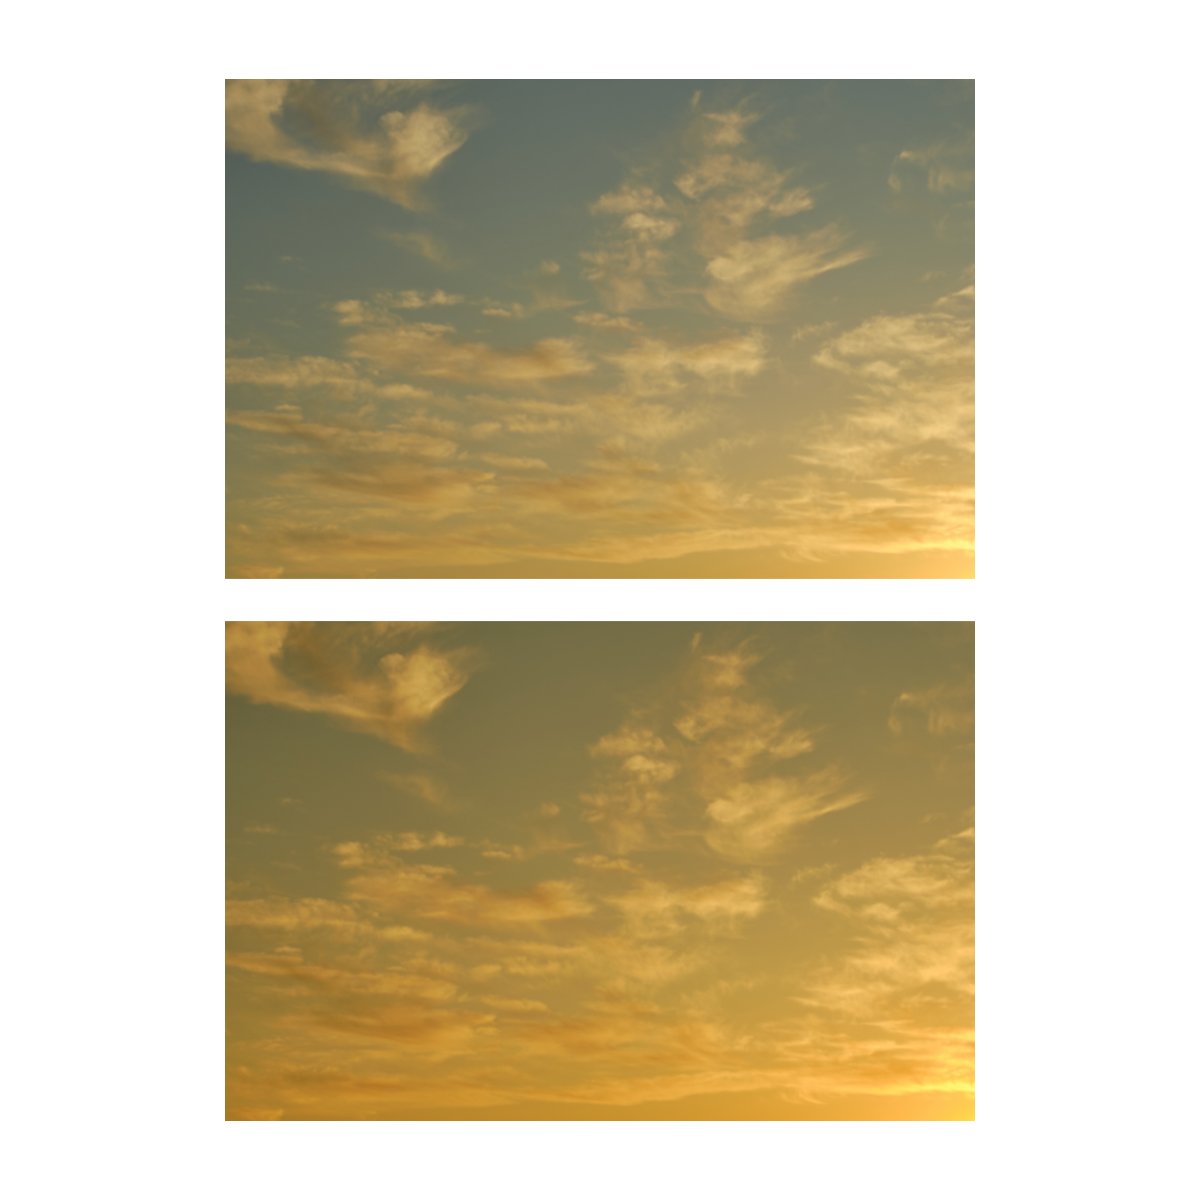
You can see the difference in my first edit and my second edit - they’re worlds apart.
Now obviously, a tone curve shift is technically different than desaturation, but the point of conflicting colors is what I wanted to get across.
And the answer to your edit isn’t always “more color”.
Does that make sense?
You Don’t Need to Use Every Tool
When we watch other photographers edit their photos, they do all this fancy stuff with the HSL panels and the color wheels, and we wanna do the same - I get it.
But interestingly I’ve found, that messing too much with the image has made many photos worse.
Things like color wheels are sharp knives.
And sharp knives must be handled with utmost caution or you’ll cut yourself.
Meaning that if we have a tool that’s this powerful, we should be extra careful.
Because things like color casting can be a great way for many photographers get their “looks” but can also be how many ruin their photos.
The antidote to this is to sometimes not use the tools available to us.
I know it feels wrong to not use something that can be so effective, but not every image needs it.
Just because a tool exists doesn’t mean you need to use it.
Here’s a great quote to keep in mind:
“To a man with a hammer, everything looks like a nail.”
But not everything is a nail and not everything needs to be hit.
Make sense?

Work With the Image, Not Against It
Perhaps the greatest editing tip I can give you is to work with the image not against it.
I emphasize this as one of the editing frameworks (synergy) in Photography Essentials - because it’s so important.
Everyone wants to make their image look a certain way.
That’s why, like in the last example, people will throw all these colors onto their images.
But sometimes it’s not necessary.
Not every photo needs to have orange highlights and teal shadows.
Like seriously.
Not every photo is meant to look like golden hour.
And trying to make every photo look a certain way to keep up with a style or aesthetic can make you go crazy.
So this is what I prefer to do:
I take a close look at the photo and remember back to when I took it.
What was the time of day, how did I feel, and what did things look like?
What colors and lighting already exist within the image I’m working with?
And then I’ll edit to that, bringing out the colors and aesthetics of that moment specifically.
That’s how you work with the image.
Don’t try to add random colors that don’t exist in your image, just play with what’s already there.
This creates for a more synergistic appeal to your photo.
It will feel right and not like the photographer tried to force the photo to become something it’s not.
Plus, you can add to this by emphasizing on the mood or colors that already exist.
If it’s a contrasty moody day, I’ll try to bring that out of the image.
If it’s a bright sunny day, I’ll just bring that out.

Yes, sometimes this means a little color cast or tint shift here and there.
But only if it’s synergistic to the photo itself.
And the decisions I make, I go by what the image already is and what it wants to be, not what I want to make it.
So work with the image, not against it.
I think you’ll not only have a better time editing but the results will show as well.

Fresh Eyes
What’s funny about photo editing is that sometimes spending too long on an edit can be our downfall.
It’s important to get the reps in of course, but you don’t want to spend too long on any individual photo.
If you find yourself struggling with an image, going back and forth, trying all the tools, and you just can’t seem to make it work, take a break.
Because sometimes you just need to look at it later.
I call this “fresh eyes”.
When we’re staring at the screen for too long our eyes get accustomed to what we’re seeing.
And then we keep doing the same stuff over and over again.
But a simple break, giving our eyes a chance to reset and look at something different, will allow us to come back and fix what’s wrong.
You’ll see what you need to do as if it was obvious the whole time.
I do this for not only photo editing, but writing, and editing videos as well.
And sometimes I’ll even notice small changes I need to make in photos I’ve already exported.
I’ll look at it later and be like, “wait, this looks a little too saturated” or “something’s not right here.”
And then I’ll go back and fix it.
It can be annoying for a photo you’ve already considered “done”, but these small revisions can have a big impact.
This is what happened with the print of Mt. Fuji I have in the back of my room.

“Fujisan”
2024
I thought this was the complete edit until I made the print and I saw all the errors show up.
Little details in the print that were more or less unnoticeable in digital began popping up.
This meant going back, masking a few things, changing the color a bit, etc.
Again it’s annoying, but if I was gonna have to go back and redo it anyways, making it part of the process could’ve saved me a lot of pain and struggle.
So remember:
If the photo just isn’t working, move on to something else and come back to it later.
Give it a second look with some fresh eyes, and you’ll know what to do.

The Rule of 100
This is today’s sole actionable advice.
If you forsake everything else in this article and just do this, your photo editing will get better.
This is “The Rule of 100”:
Edit 100 photos a day or spend 100 minutes a day editing photos.
Do this for 100 days and you will get better at photo editing.
This is a concept I learned from Alex Hormozi that’s helped not only my productivity but also photography.
It’s a simple and obvious equation but most people won’t do it.
The more you edit photos, the better you’ll get at photo editing.
The better you get at photo editing the more you’ll understand.
The more you understand, the more you question the meaning of presets because you just wont need them.
Think about it.
If you do 100 reps of something every day you are going to get better.
It’s inevitable.
And it really is that simple, but most people are lazy and they don’t wont to do the work.
So they’ll search for tricks and hacks online, and eventually buy presets because it’s an easy shortcut.
But if you follow The Rule of 100, you wont need presets.
Because you can edit the photo raw or just make your own if you want.
This doesn’t just work for photography.
Apply it to any and everything in your life.
100 minutes of exercise, 100 minutes of meditation, 100 minutes of journaling.
If 100 sounds like too much, start with 50, or round up for an even 1 hour.
If you fail or miss a day, shake it off and start again tomorrow.
And if there’s something you don’t know how to do, google it, figure it out, and keep moving.
Most people don’t scratch 100 anything on any day and they wonder why they’re not making progress.
So literally, that’s the whole process.
If you do and apply it, you’ll make progress in anything in life, because experience is the best teacher.

So, how do we get so good at photo editing you question the meaning of presets?
First, don’t overdo it.
It’s important to remember that “less is more”, and we don’t want to cook our photos.
Next, creating variants will allow you to play with multiple versions and see which style or edit looks better.
Learning to desaturate will help you understand that more color isn’t always better and can even help remove conflicting colors from your photo.
Furthermore, not every tool in your photo editing software needs to be used, and our edits can even be better if we don’t use them.
Plus, our edits would improve if we focused on synergy: working with the image, not against it.
And of course, fresh eyes - giving your brain some time to come back to the edit later and see what needs to be done.
Finally, remember to get in the reps.
Most people don’t put enough time in and wonder why they still suck.
Follow the Rule of 100 and stick to it:
100 edits a day or 100 minutes of editing for 100 days.
If you do this you will get better - it’s inevitable.

If you learn, understand, and apply these things, you wont need presets.
Because you’ll be able to edit, tweak, and change your photo to look like however you want without overdoing it and making it worse.
Plus you’ll be able to understand why certain photos look certain ways and be able to reverse engineer them to create your own version.
And then with your newfound knowledge and experience, you might start to question why presets exist in the first place.

So I hope you found this valuable.
If you did, please share this with a friend who’s also looking to improve their photo editing.
If you want to learn more, check out Photography Essentials, there’s a few chapters on photo editing where I walk you through some editing concepts.
It’s free by the way.
You can also help support me by adding to the travel fund or getting a copy of my latest zine “The Sinking Sun”.
Thanks again, have a great day.